
Azure · Bastion · Máquinas Virtuais · Virtual Network
Improve Security with Azure Bastion
Are you looking for a new way to improve security when connecting to your virtual machines in Azure? You should check out Azure Bastion.
In the past, to ensure RDP and SSH connectivity to your Azure Virtual Machines, you would probably have used a jump box where people would connect to access the other VMs.
Of course, a jump box improves the security of your access, but it introduces some gaps that Azure Bastion addresses.
Azure Bastion overview
First, Azure Bastion is a platform-as-a-service that provides secure RDP and SSH connectivity to protect your Azure virtual machines.
The Azure Bastion implementation enables access to all VMs within a virtual network through a single reinforced access point, the AzureBastionSubnet.
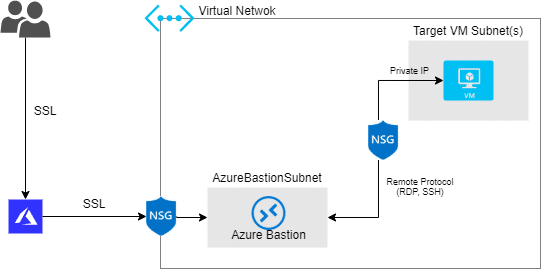
And as you can imagine, the connection to your VM will now occur through the Azure Portal, which connects to the Azure Bastion service using its public IP and loads your VM directly in your browser.
Cost
To enjoy the benefits of Azure Bastion, you will incur an additional cost to your subscription
US$0.19/hour (~ US$138.70/month per Azure Bastion)
There is also outbound data transfer cost, but prices may vary depending on usage. However, the first 5 GB/month are free.
Requirements
To create the Azure Bastion in your Subscription
- Your virtual network must have a Subnet named AzureBastionSubnet
- The AzureBastionSubnet must be /27 or larger
- Azure Bastion uses a Public IP and must be of the Standard Public IP SKU
To use Azure Bastion
- Any HTML5-compatible browser
- Users or Security Groups using the Azure Bastion resource must have
- Reader role on the Virtual Machine(s)
- Reader role on the network interface where the VM's private IP resides
- Reader role for the Azure Bastion resource
Creating Azure Bastion in a new environment
Create Azure Bastion
First, we will create the Azure Bastion resource by typing Azure Search Bastion and clicking on Bastions

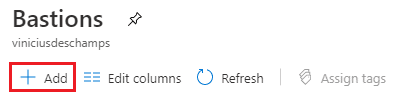
In Bastions, we will click on Add
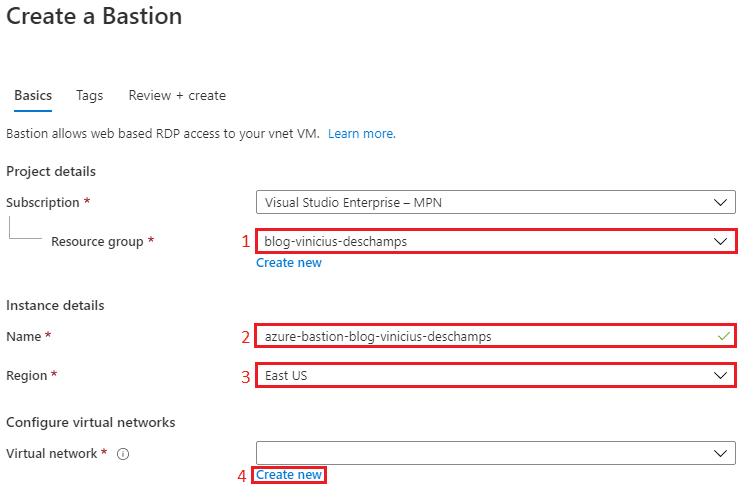
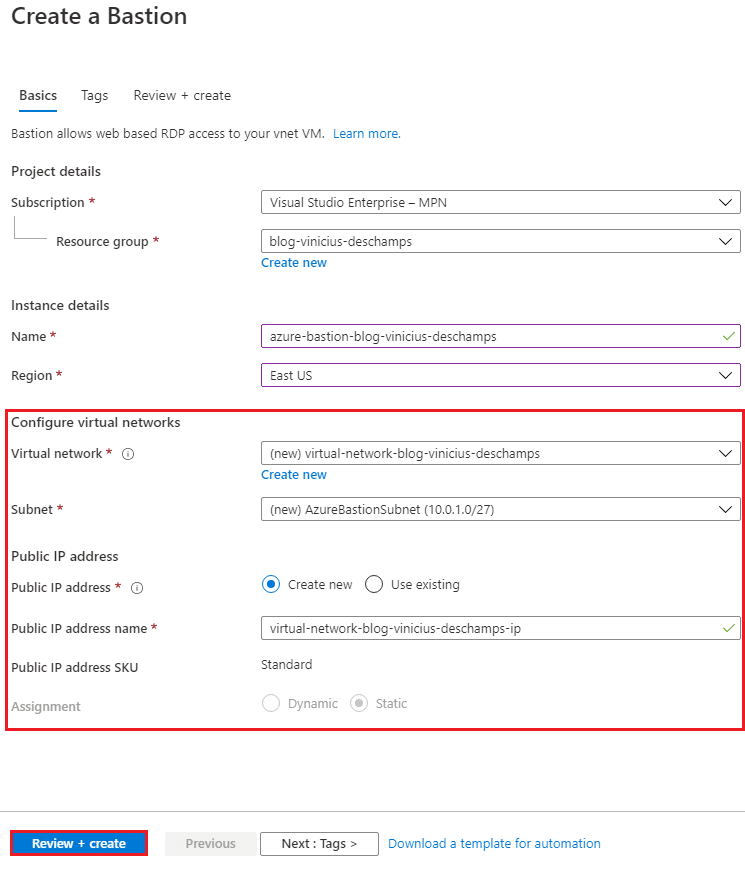
To create Bastion, select the Resource group (1), an Name (2) for your Bastion instance, the Region (3), then click Create new (4) to configure the new Virtual Network
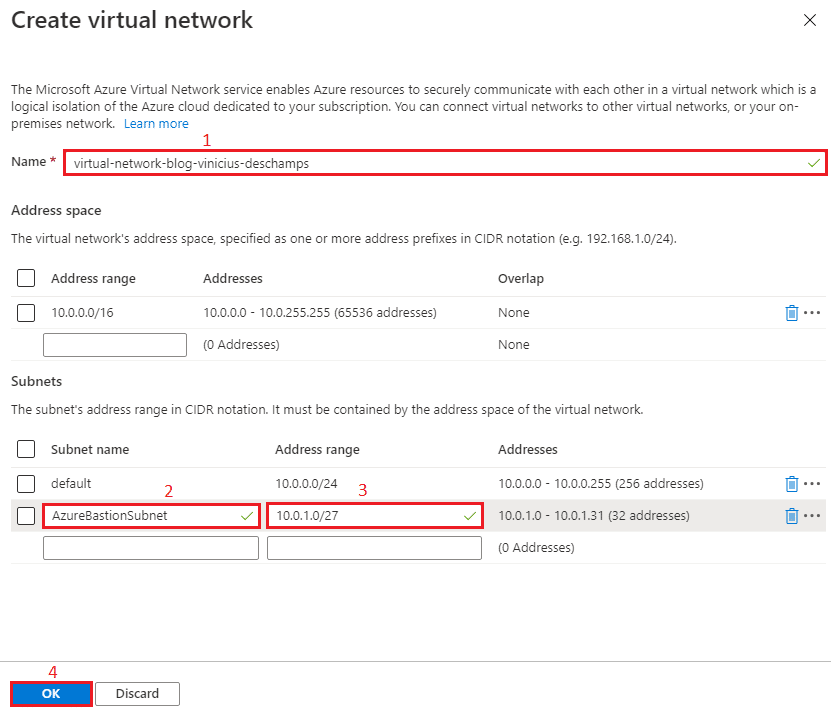
When creating a virtual network, keep in mind that your Azure Bastion must have a subnet called AzureBastionSubnet and the address range must be at least /27 and the address space must be able to accommodate it.
After creating the new Virtual Network, everything else is under Configure Virtual Networks and properly filled, but feel free to change if you have a specific need to create the Bastion resource. Then, click Review + Create
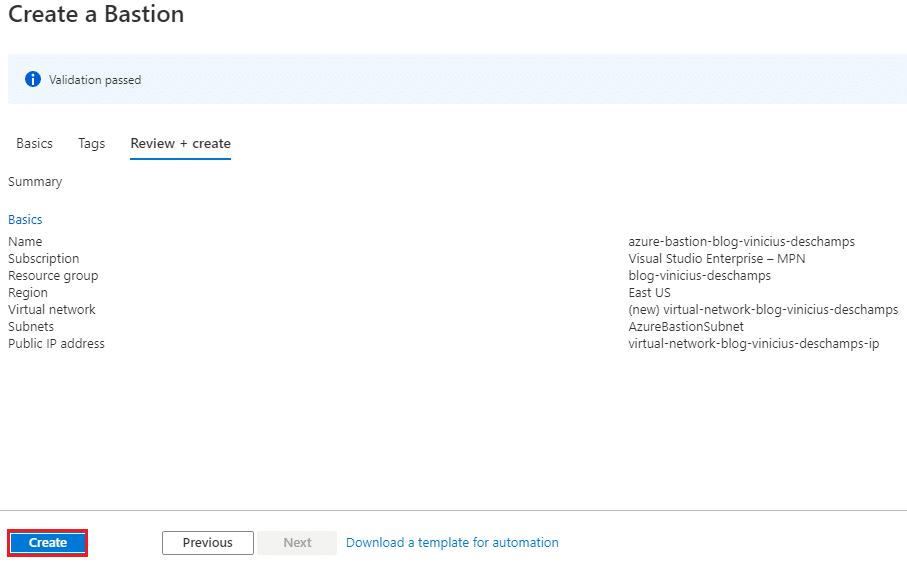
Now, re-check that everything is OK and click Create
Create a virtual machine with Bastion access
Type Virtual Machines, and click Virtual machines in the Azure Portal search

In Virtual Machines, go to Add (1) and Virtual Machine (2)

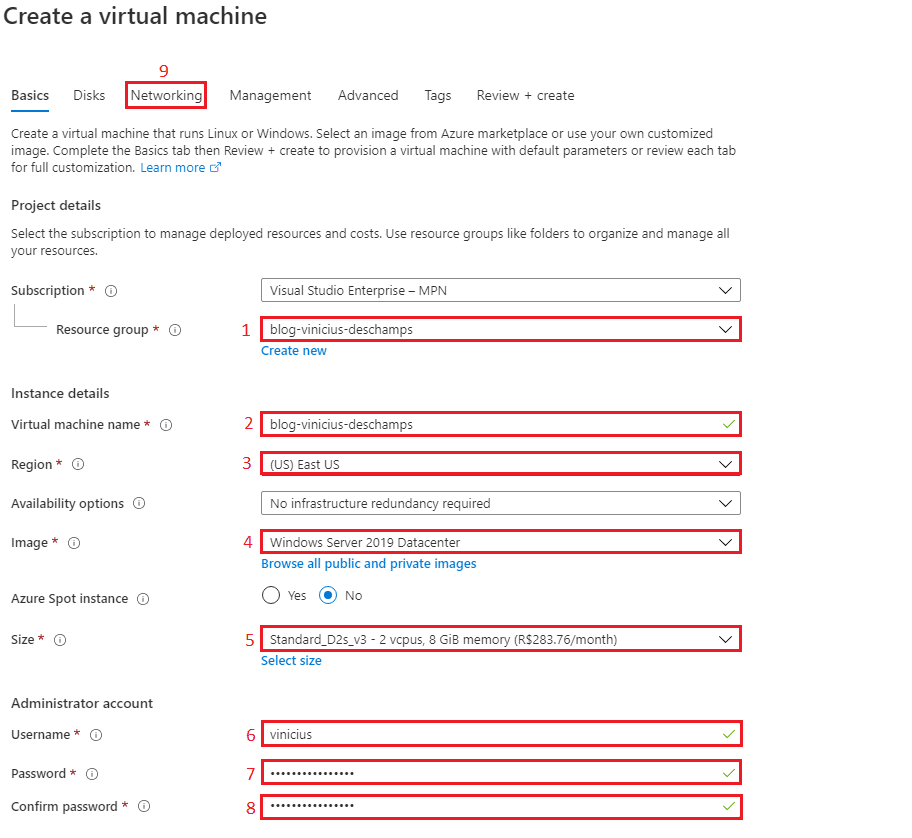
You will need to provide all information from 1 to 8, then go to the Networking tab
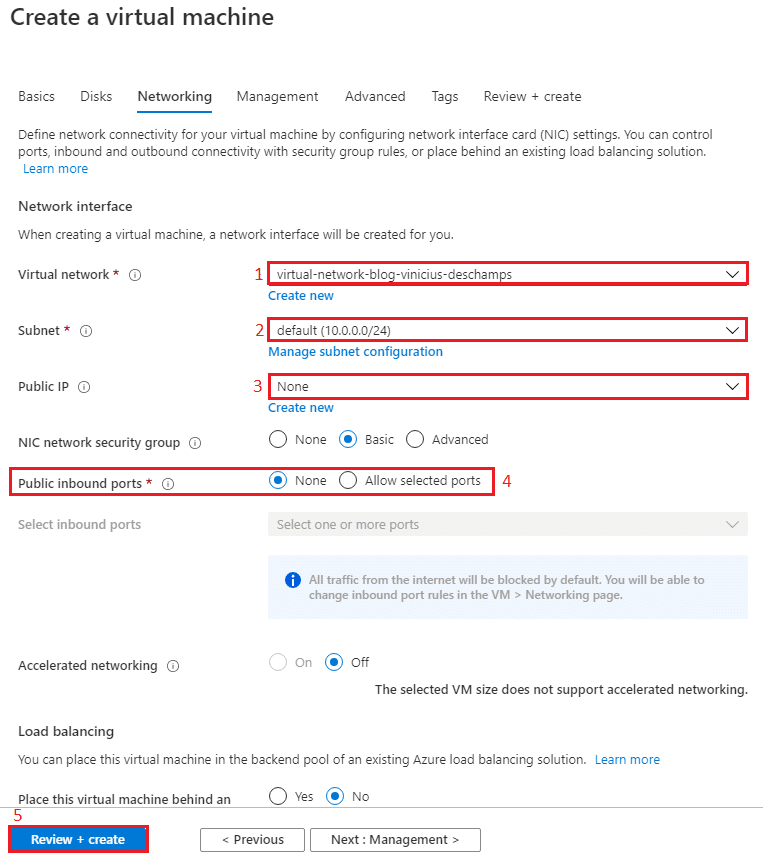
In Networking you should be careful when choosing options and ensure that you select the same Virtual Network (1) used to create the AzureBastionSubnet, and choose any available Subnet (2).
Note that I chose None for the Public IP (3) and Public inbound ports (4) because Azure Bastion does not require the virtual machine to have a Public IP, since we will connect through Azure
Then click Review + Create
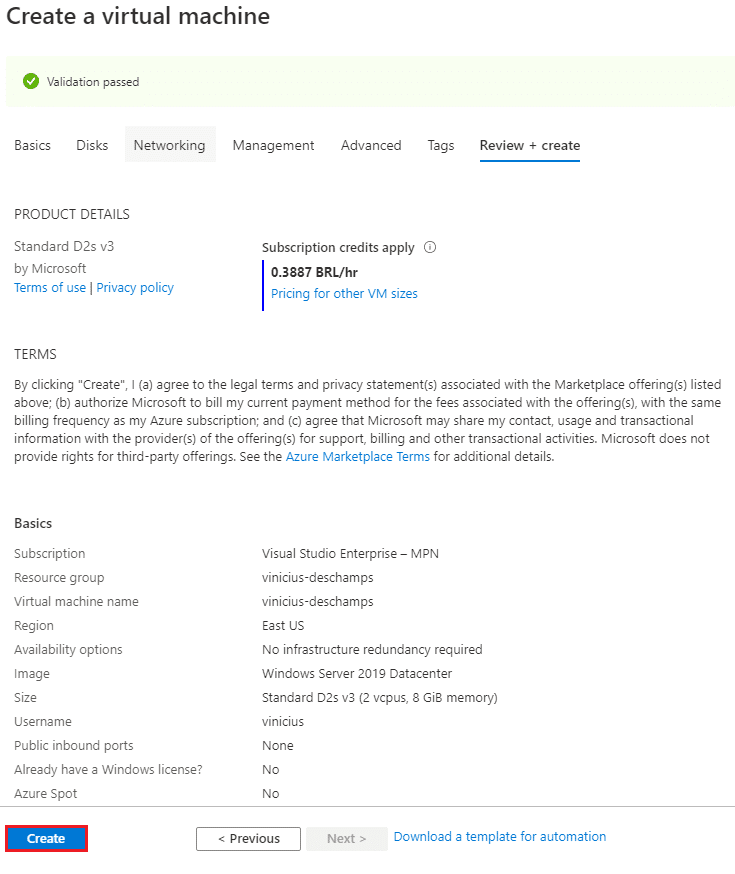
Verify that everything is correct with the information and press Create
Connect to your virtual machine using Bastion
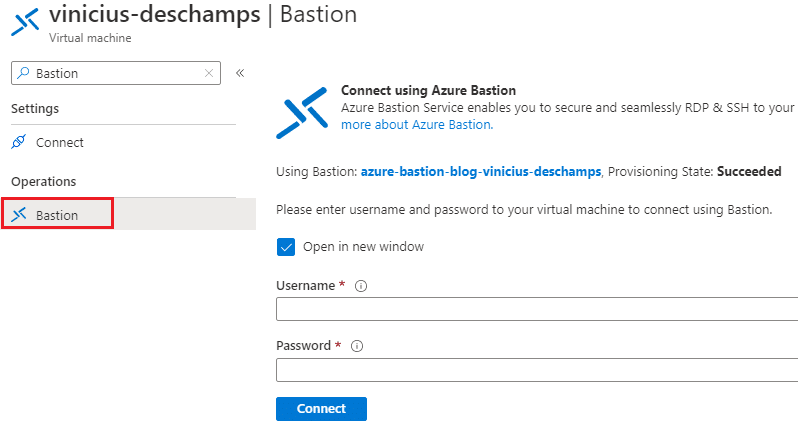
Go to the virtual machine you created and look for Bastion
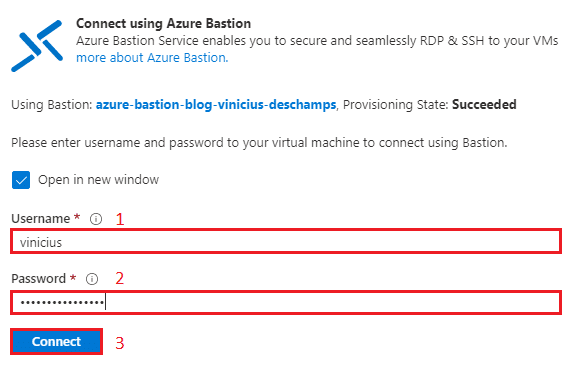
Fill in your Username (1) and Password (2), then press Connect (3)
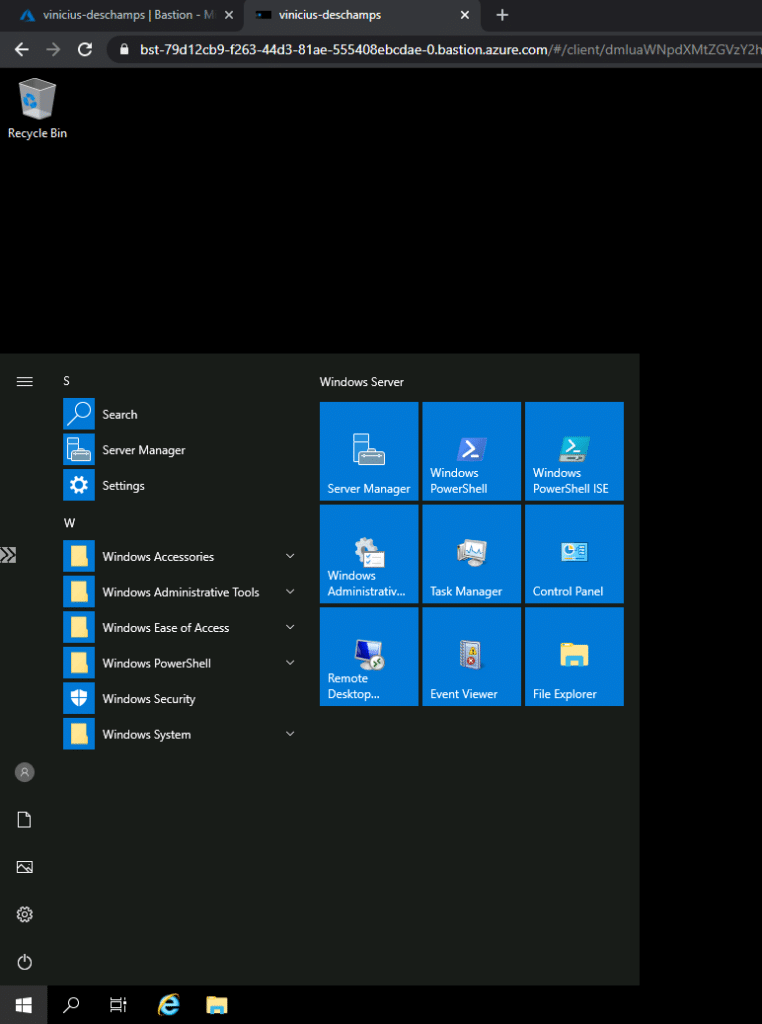
Voila, you are now accessing your Virtual Machine through the browser, using Bastion
And for those who want a little more, here is a demonstration we did at Azure Floripa