Azure · Bastion · Máquinas Virtuais
Granting Access to a Virtual Machine Using Azure Bastion
Today I’ll show how to grant access to a Virtual Machine using Azure Bastion.
Azure Bastion
As you may have seen in my article about Improving Security with Azure Bastion, Azure Bastion is considered a Platform as a Service (PaaS) that provides secure RDP and SSH connections to protect access to your virtual machines.
That said, your virtual machines are no longer exposed to the Internet when Azure Bastion is configured, so access to them is made directly through the Azure Portal.
Access Control (IAM)
While you want to improve security, using Azure Bastion, you don’t want to open all access in the Azure Portal to any user, right?
To restrict access and allow only specific users to use/access the virtual machine via Azure Bastion, you need to use Access Control (IAM), which provides granular access to Azure resources, and can also be applied specifically to Azure Bastion.
Azure Bastion Permissions
The minimum permissions required for Azure Bastion are the Reader permissions
- On the Virtual Machine
- On the Network Interface Card (NIC) that has the VM’s private IP
- The Azure Bastion resource
How to grant access to the virtual machine
Go to the virtual machine where you configured Azure Bastion, click it (1), go to Access control (IAM) (2), press Add (3) and then Add role assignment (4)

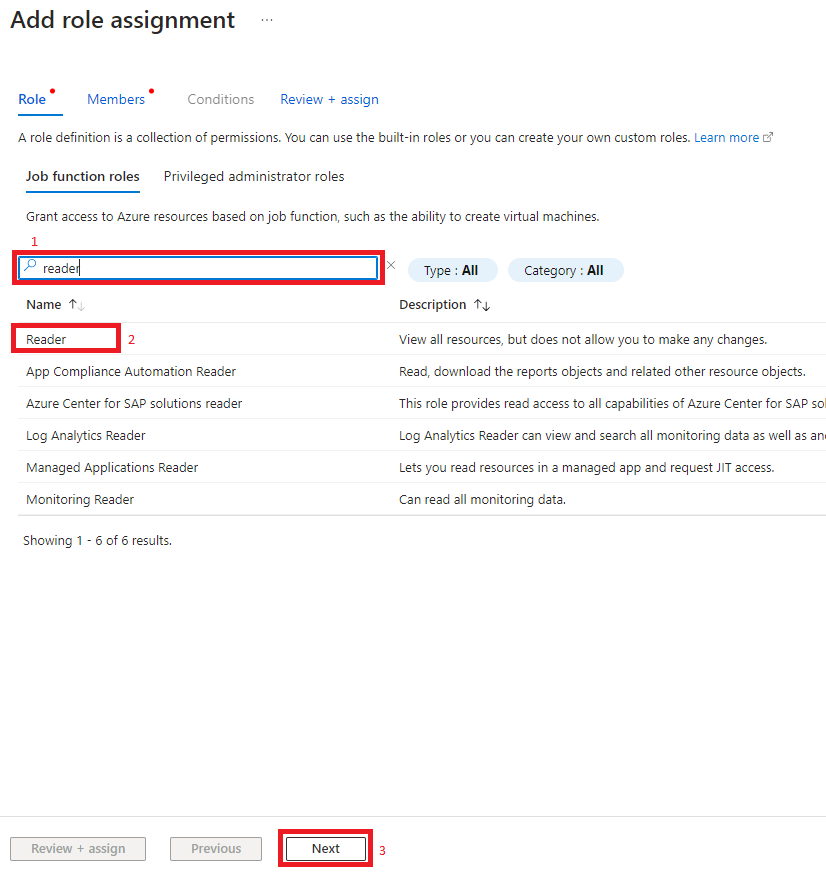
In Add role assignment, type Reader (1) in the search field, click the role that appears, in this case Reader (2) and then press Next
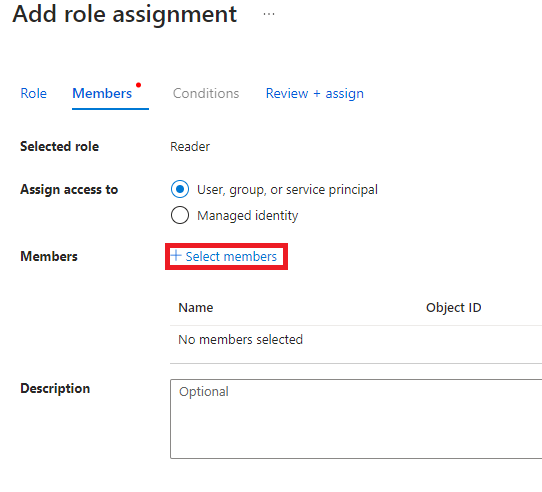
In the next window, you will have to select the members who will receive the role, then click Select Members
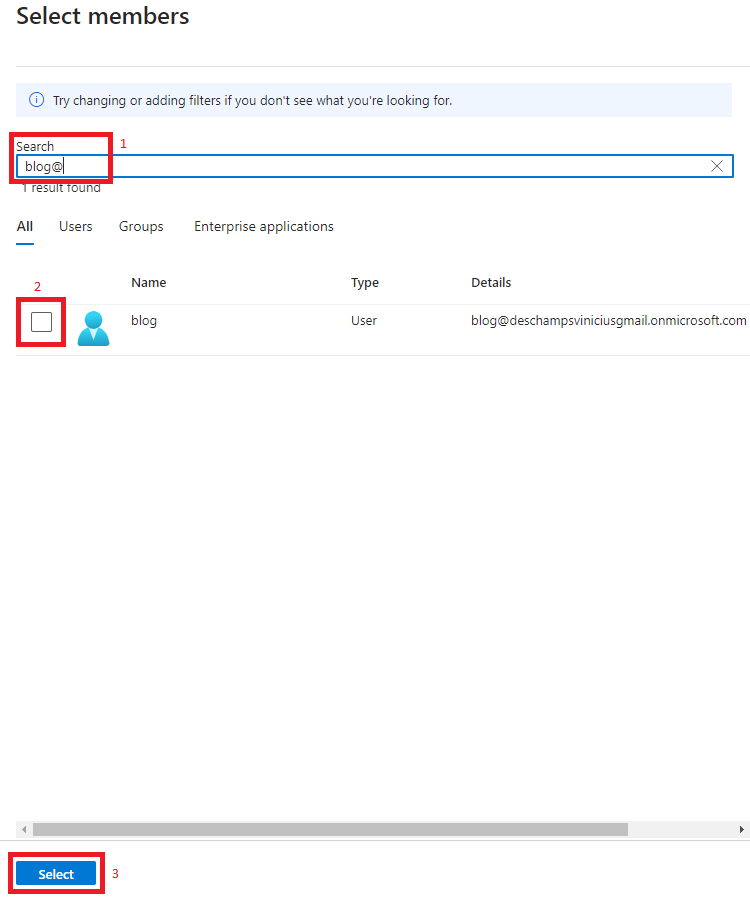
Now, type in the search field who you want to add (1), check the box (2) and press Select (3)
Now, click Review + Assign, verify everything is correct on the next screen and press again Review + Assign
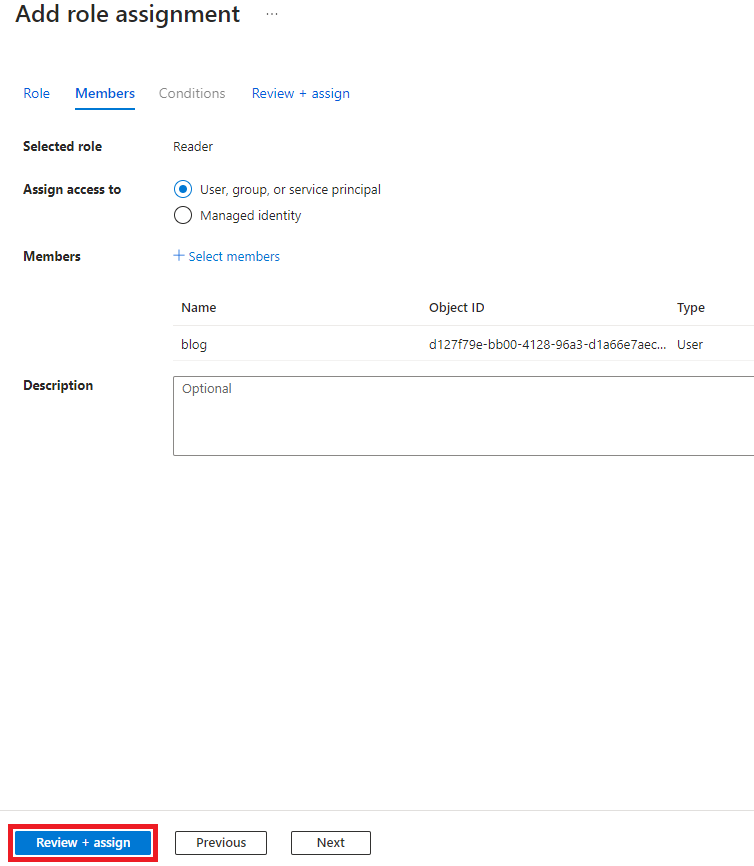
If you try to use the Azure Bastion right after this permission, you won’t see errors, you simply won’t be able to connect yet with Bastion
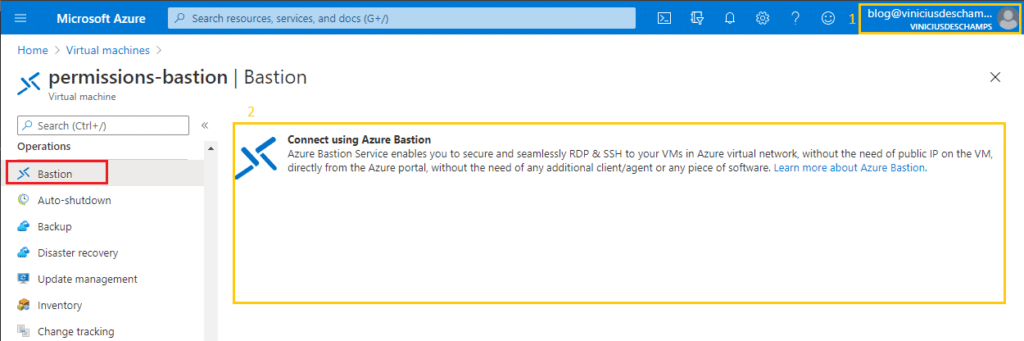
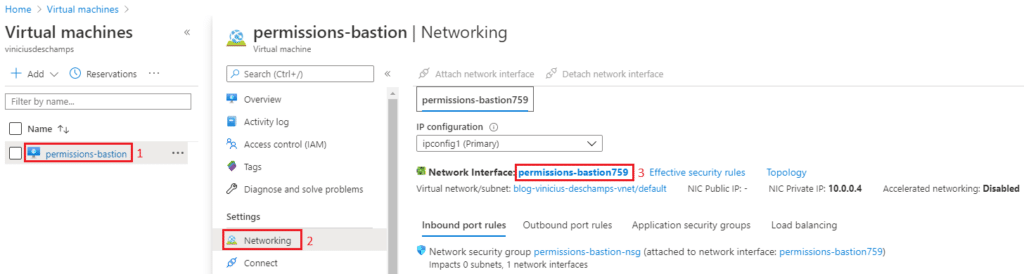
Network interface with the Virtual Machine’s private IP
Still in the VM (1), go to Networking (2), then Network interface (3)
Once in the Network interface, go to Access control (IAM) (1), Add (2) then Add role assignment (3)
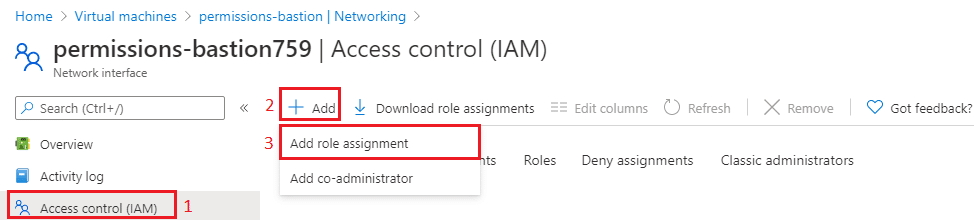
And you’ll repeat the same steps you did to add the Reader permission to the virtual machine
In Add role assignment, type Reader (1) in the search field, click the function that appears, in this case Reader (2) and then press Next
In the next window, you will have to select the members who will receive the role, so click Select Members
Now, type in the search field who you want to add (1), check the box (2) and press Select (3)
Now, let’s click Review + Assign, verify everything is correct on the next screen and press again Review + Assign
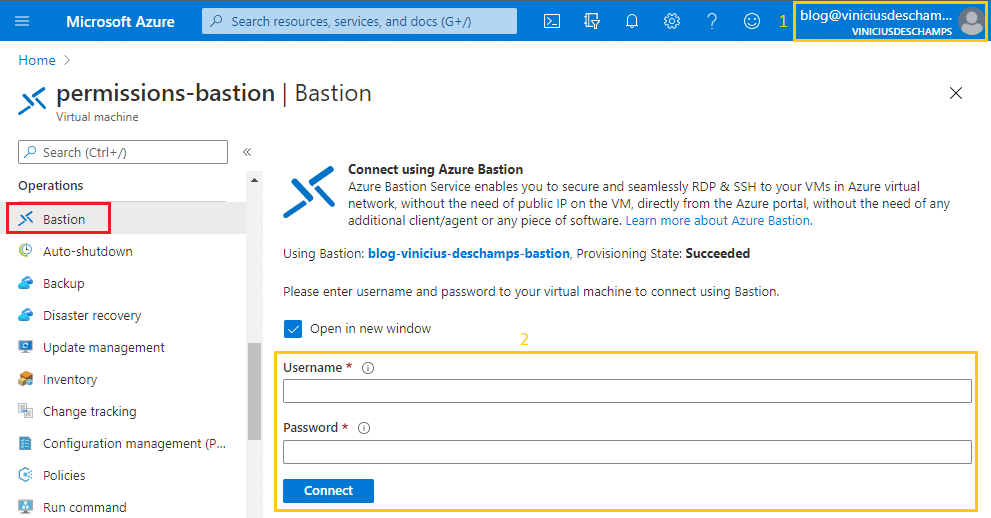
voilà! Now you’re seeing the options to fill your Username, Password, and Connect