
Azure · Network
3 Ways to Reduce Network Latency in Azure
Network latency is considered one of the factors for the success of your application's performance, and in Azure there are several possibilities to reduce it.
Network Latency
In short, it is the response time between the moment you perform an action and the moment you see your result

How can I measure network latency?
I use the PsPing and for Linux environments you can use SocketPerf.
In an ideal scenario, you should have access to the servers you want to test, in order to perform client-server connectivity
Configuring the server
Open CMD or PowerShell, navigate to the folder where you extracted PsPing and use the following command
psping -s 192.168.0.4:5000
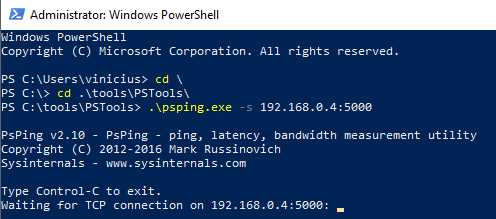
Client-to-server connection
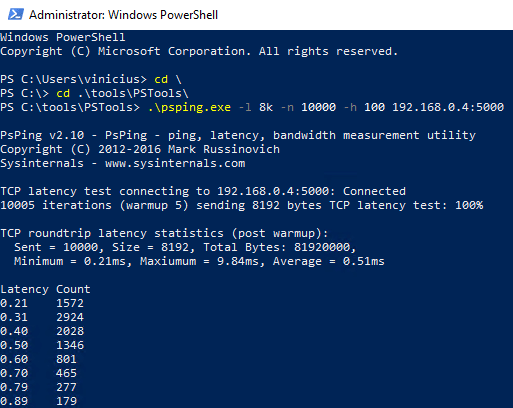
Open CMD or PowerShell, navigate to the folder where you extracted PsPing and run the following command
psping -l 8k -n 10000 -h 100 192.168.0.4:5000
Client Response
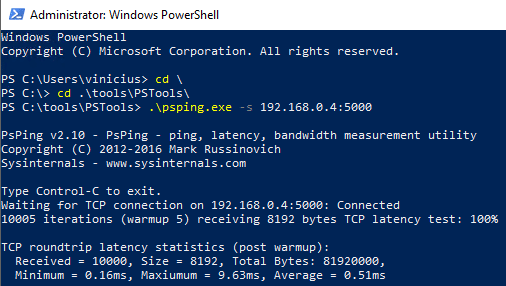
Server Response
Azure Resources
Azure provides some resources to reduce latency for virtual machines, listed below
- Accelerated networking
- Receive Side Scaling
- Proximity Placement Groups
Accelerated Networking
Using Accelerated Networking the traffic forwarded to the VM comes directly from the VM's network interface, and no longer goes through the host and the virtual switch, reducing the number of hops to reach your destination.

Compatible Scenarios
Operating Systems
- Windows Server 2022
- Windows Server 2019 Standard/Datacenter
- Windows Server 2016 Standard/Datacenter
- Windows Server 2012 R2 Standard/Datacenter
- Ubuntu 14.04 with linux-azure kernel
- Ubuntu 16.04 or later
- SLES12 SP3 or later
- RHEL 7.4 or later
- CentOS 7.4 or later
- CoreOS Linux
- Debian “Stretch” with backports kernel
- Debian “Buster” or later
- Oracle Linux 7.4 and later Red Hat Compatible Kernel (RHCK)
- Oracle Linux 7.5 and later with UEK version 5
- FreeBSD 10.4, 11.1 & 12.0 or later
Compatible VM instances
- Most general-purpose and compute-optimized VM sizes with two or more vCPUs support Accelerated Networking
- You can directly query the SKU list by running the command below
az vm list-skus --location westus --all true --resource-type virtualMachines --query '[].{size:size, name:name, acceleratedNetworkingEnabled: capabilities[?name==`AcceleratedNetworkingEnabled`].value | [0]}' --output table
Enable Accelerated Networking
Enable Accelerated Networking with Powershell
$virtualMachine = "proximity-02"
$resourceGroup = "blog-vinicius-deschamps"
$nicName = "proximity-02521"

Stop-AzVM -ResourceGroup $resourceGroup -Name $virtualMachine

$nic = Get-AzNetworkInterface -ResourceGroup $resourceGroup -Name $nicName

$nic.EnableAcceleratedNetworking = $true

$nic | Set-AzNetworkInterface

Start-AzVM -ResourceGroup $resourceGroup -Name $virtualMachine
Receive side scaling
If your VM does not meet the compatible scenarios to enable accelerated networking, you can enable Receive Side Scaling to achieve a higher maximum throughput.
However, the ideal scenario would be to have both resources enabled.
Compatible Scenarios
- Windows Server 2012 R2 or later
- Linux kernels released from October 2017
Check Receive Side Scaling on the VM
Receive side scaling can be disabled by default on a Windows VM in Azure, and is always enabled by default on a Linux VM in Azure.
To check on the Windows VM, connect to it and open PowerShell and type
Get-NetAdapterRss
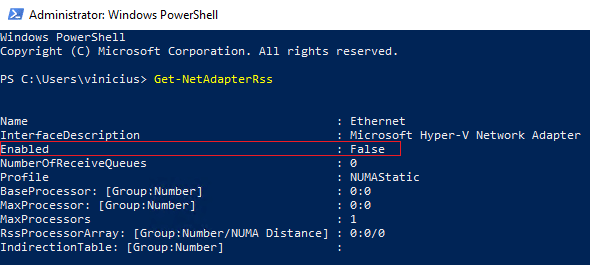
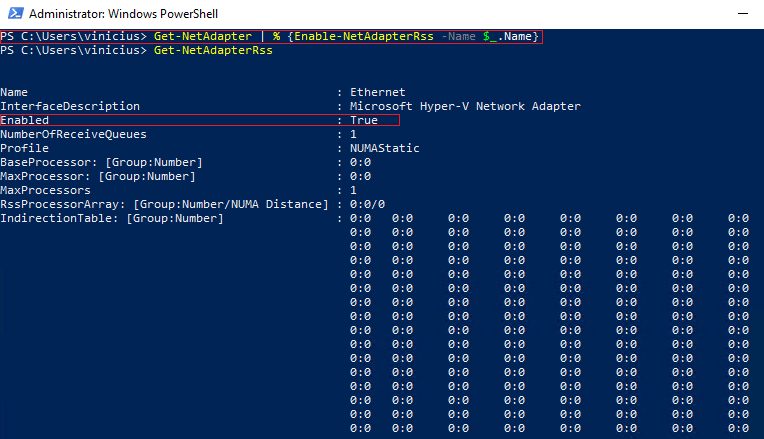
As you can see, RSS is set to False in the Enabled parameter, so to enable it, type the following command
IMPORTANT: The Virtual Machine will lose connectivity when running the command below
Get-NetAdapter | % {Enable-NetAdapterRss -Name $_.Name} # It will Enable the RSS
And this command does not show anything on the screen, so to verify whether it worked or not, use Get-NetAdapterRss once more
Proximity Placement Groups
When you provision a virtual machine in Azure and choose a region, the VM may be provisioned in any datacenter in that region and, if you need low latency, you may encounter issues.
The Proximity Placement Group allows virtual machines to be physically co-located with each other through a logical grouping that helps reduce latency.
Activate Proximity Placement Group
In the Azure Portal, use the search and type Proximity, then click Proximity Placement Group

Now, click Add

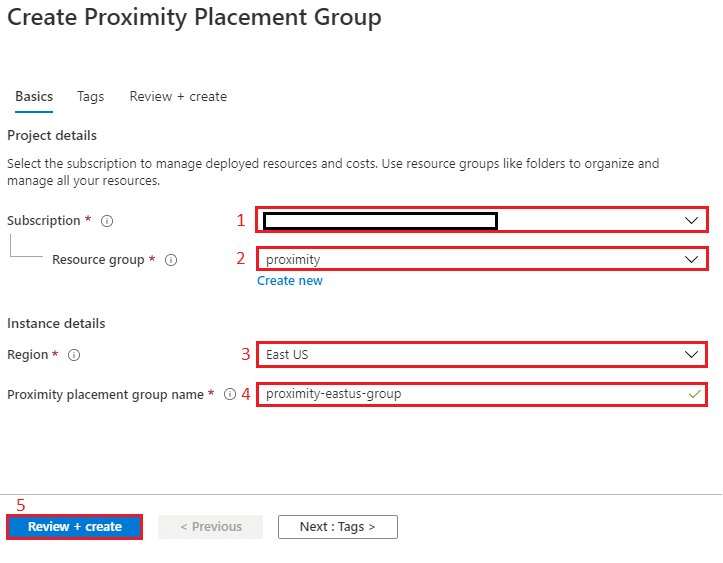
You need to choose Subscription, Resource Group, Region and Proximity Placement Group Name, then press Review + create
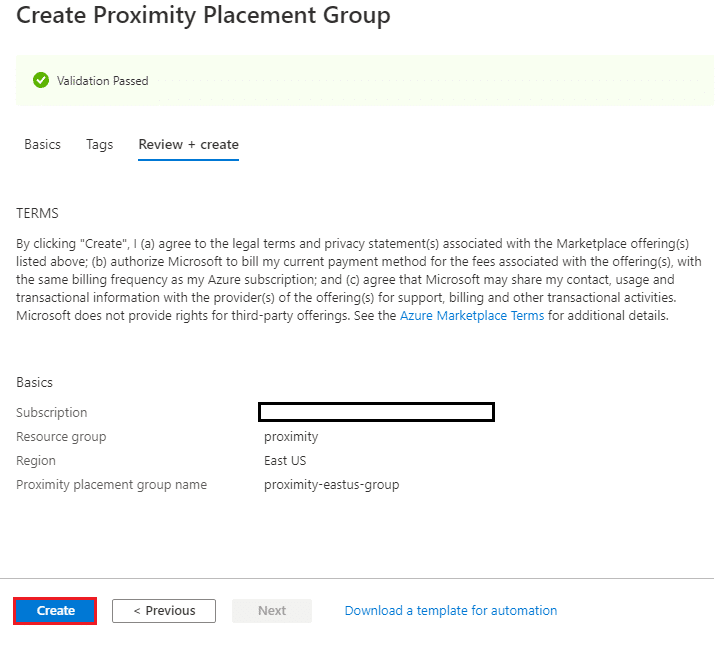
Review the summary of the Proximity Placement Group, and press Create
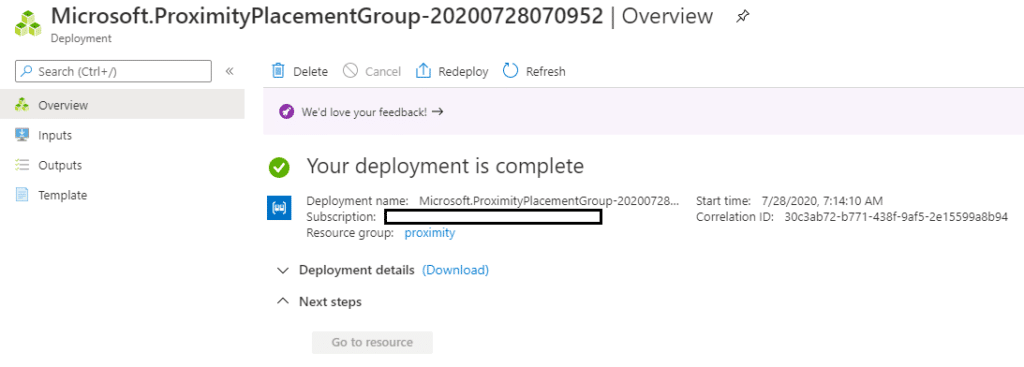
Once you receive Your deployment is complete, you are ready to change the Proximity Placement Group of your virtual machine
IMPORTANT: Your VM must be Stopped or “Deallocated” for you to change the Proximity Placement Group
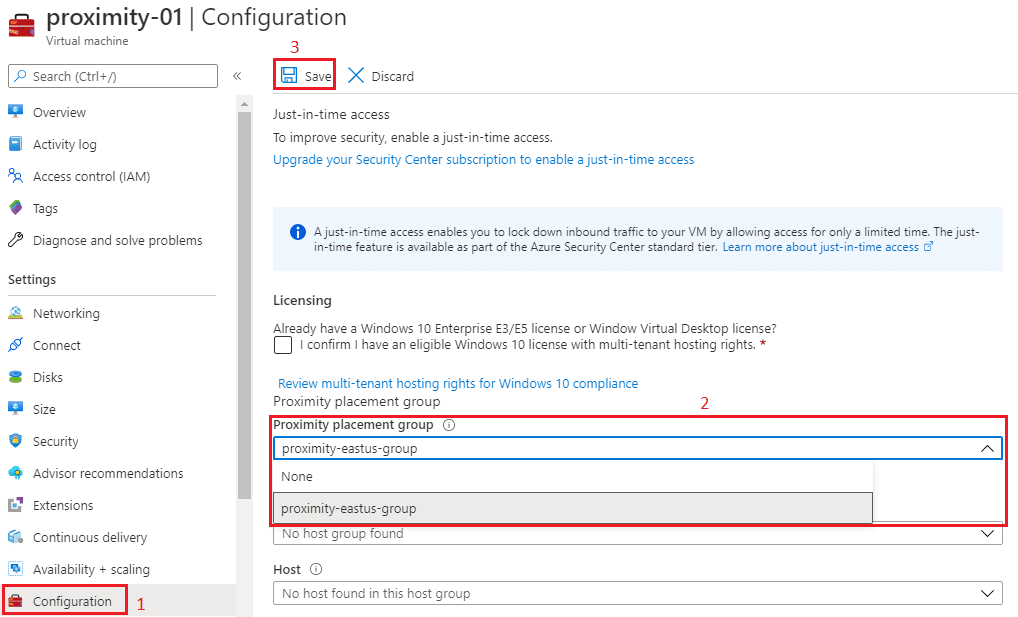
In your Virtual Machine, go to Configuration, choose the Proximity Placement Group and click Save
Testing
I have 3 virtual machines, and 2 of them have Accelerated Networking, Receive Side Scaling, and are part of the same Proximity Placement Group.
| Virtual Machine | Accelerated Networking | Receive Side Scaling | Proximity Placement Group |
| proximity-01 | Enabled | Enabled | proximity-eastus-group |
| proximity-02 | Enabled | Enabled | proximity-eastus-group |
| proximity-03 | Disabled | Disabled | – |
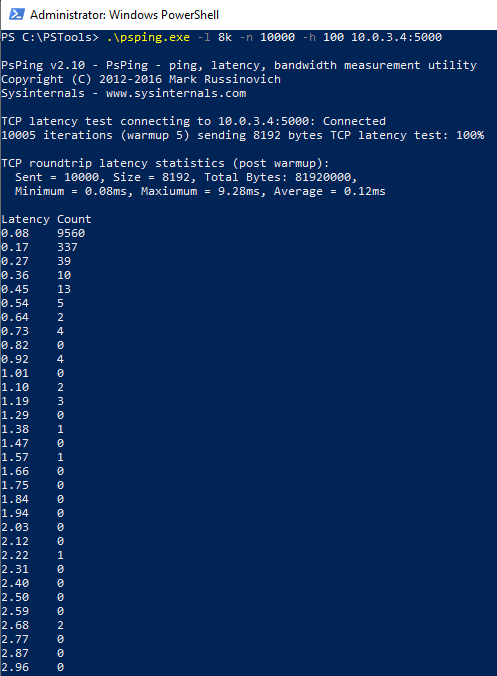
Follow the steps shown earlier in “How can I measure network latency?” to perform these tests and the VM proximity-01 was chosen as our “server” and proximity-02 and proximity-03 as clients
proximity-02 to proximity-01
proximity-03 to proximity-01
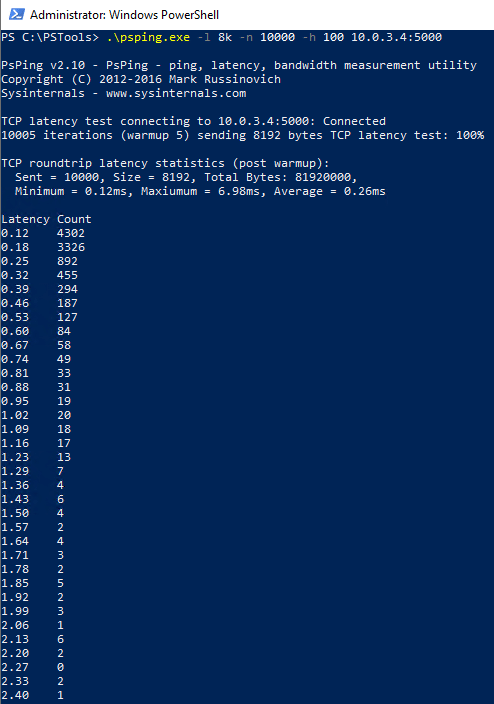
The latency difference was 0.04 ms but remember that the packet used was 8192 bytes, which means that for a larger packet you will have a higher latency.
If your application has latency-sensitive workloads, you should certainly consider enabling and applying these resources to your VMs.