As you probably know Sitecore standards send the content from Master to Web database (or publishing database if you prefer), however, Sitecore also provides a way to add more publishing targets.
Do you wonder why multiple publishing targets are required? Back in 2011, John West listed some good reasons to have multiple publishing targets
Traffic, geographic distribution, redundancy and other scalability considerations often demand that customers publish everything to multiple publishing targets supporting different banks of content delivery servers in a single location or multiple locations. This is probably the most common use of publishing targets.
Publish to a pre-production publishing target for evaluation before go-live. This has some addressable challenges, such as how to publish from a non-final workflow state.
Publish some of the managed sites to one publishing target and other sites to another. This reduces publishing time and database storage, but also has disadvantages, such as complicating content sharing, and might be hard to integrate with other approaches listed here.
Interested? Well, assuming you already have an extra Web database in-place… Let’s see the steps to accomplish it
Add new database connection in ConnectionStrings.config
1. Access Content Management’s ConnectionStrings.config, and add a new database connection
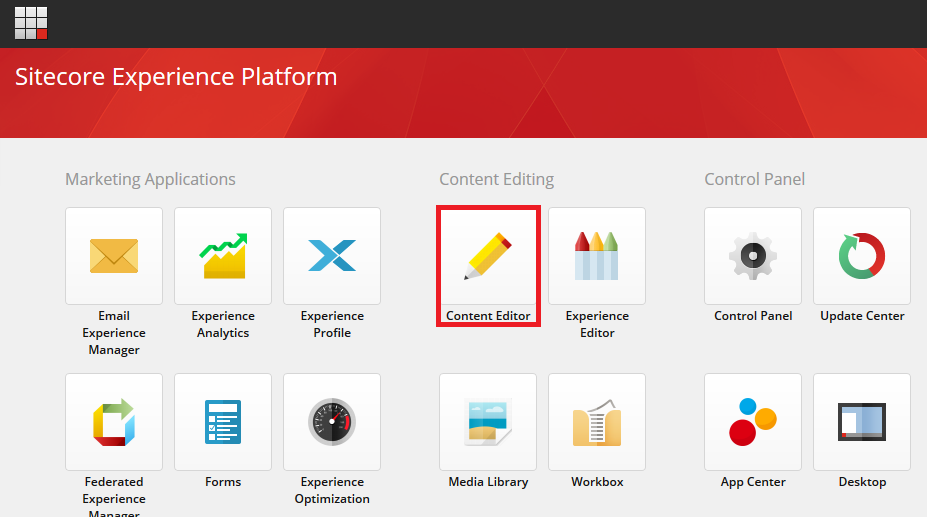
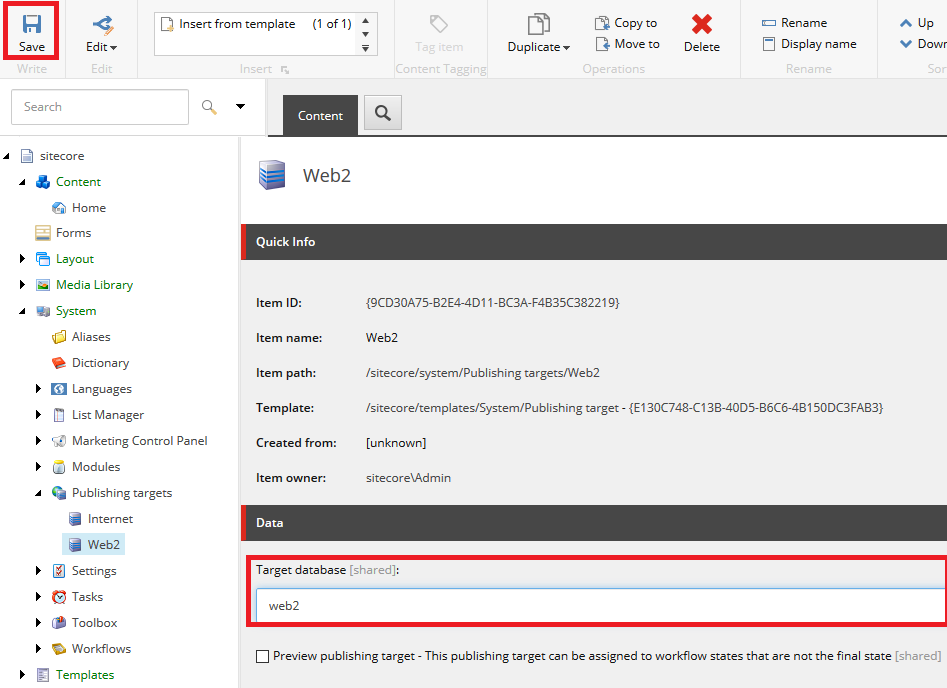
2. Browse to your CM, and access /sitecore page and click Content Editor
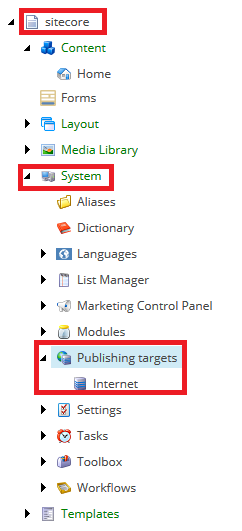
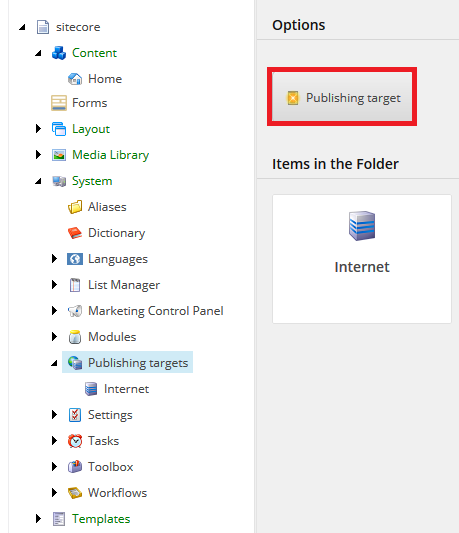
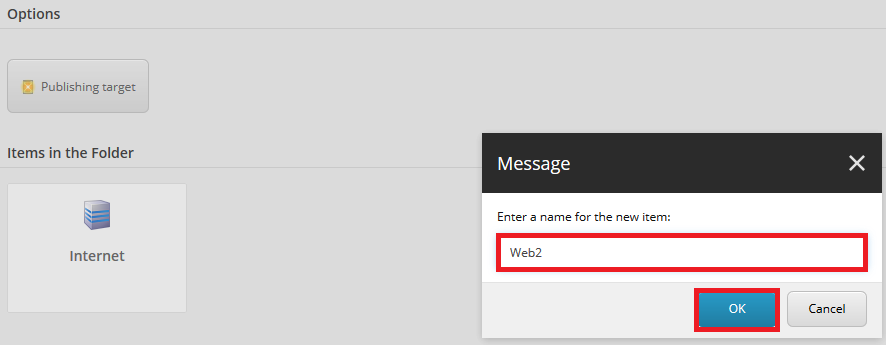
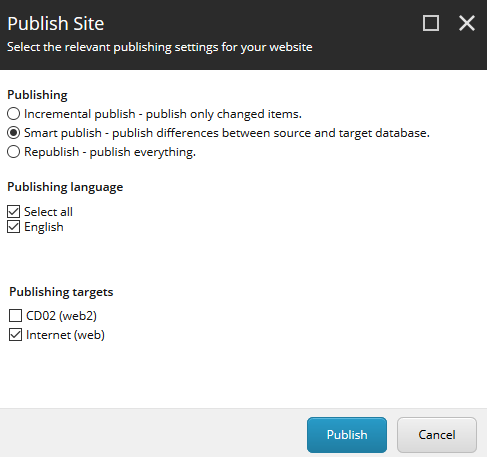
3. Once Content Editor is open, navigate to sitecore > System > Publishing Targets 4. You will see Publishing target button, click on it 5. Choose a name for your new Publishing Target, and press OK 6. The Web2 is now part of Publishing Targets, so fill the Target Database with the same name you set in the ConnectionStrings.config on Step 1, then click Save button
Add Web2 database in Sitecore.config
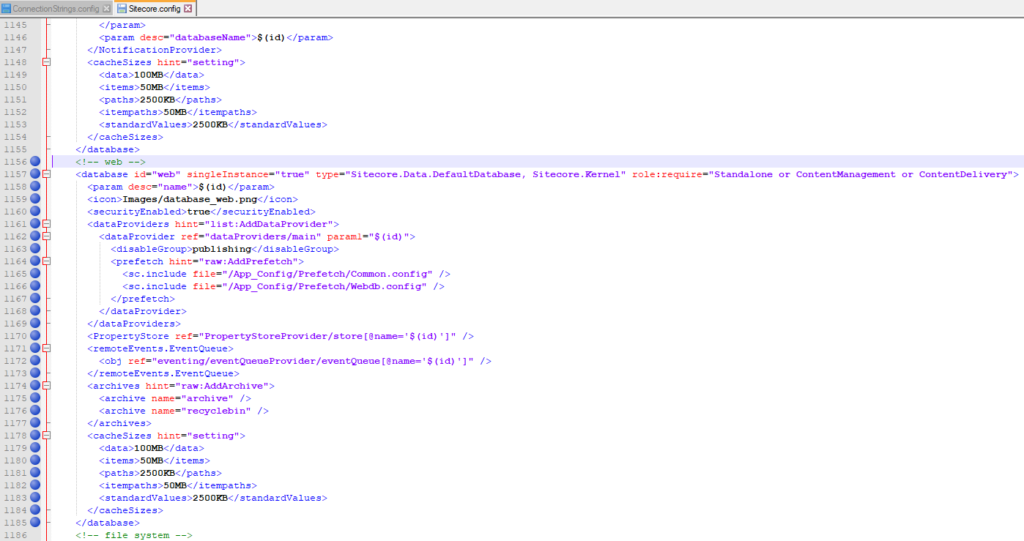
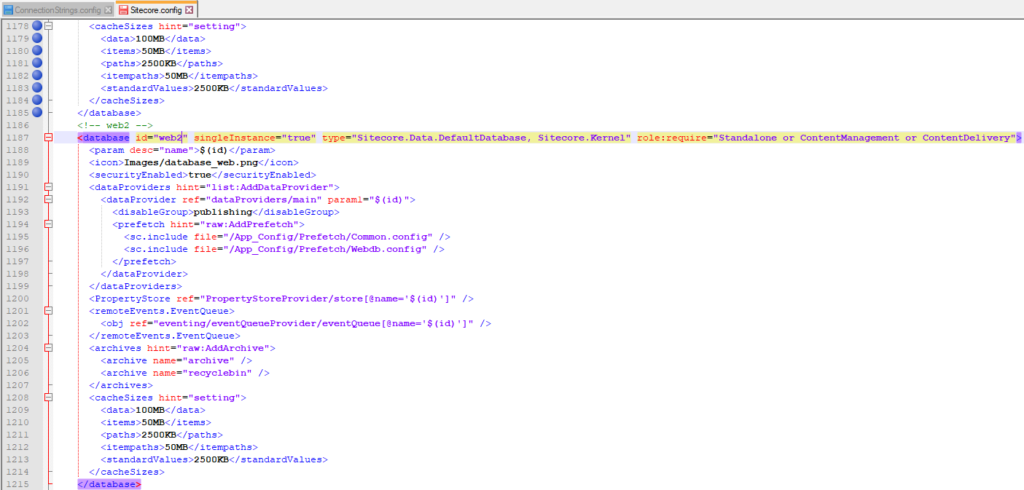
7. Navigate to your Sitecore.config file, and find for (around line 1078), then locate (around line 1156), then copy from to <!– web –>
8. And paste the content after , then modify the following entries and save the file
<!– web –> to <!– web2 –> I know it’s just the comment but let’s keep things organized 🙂
<database id=”web” to <database id=web2
Straightforward, isn’t it? NOT SO FAST BUDDY!
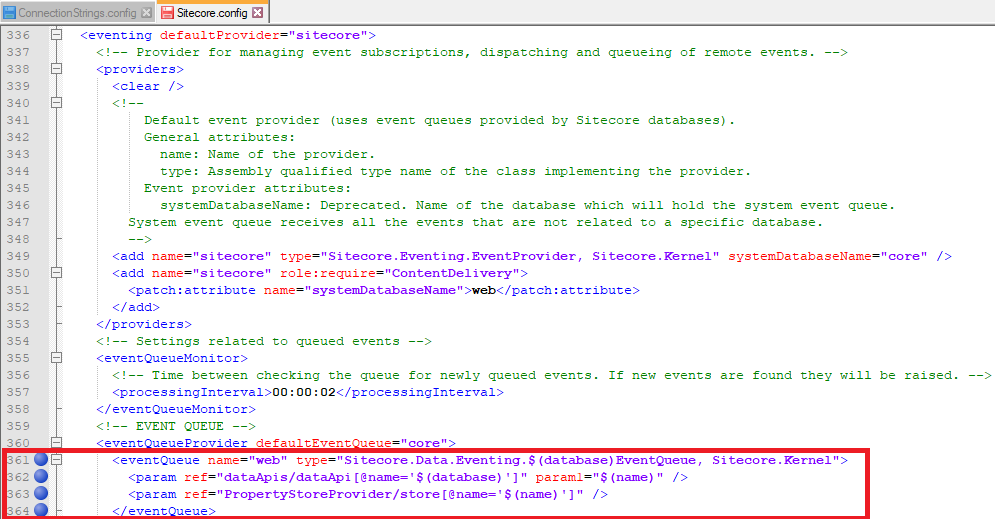
Right after performing the steps above, if you check your Sitecore instance you will face an Yellow Screen of Death (YSOD) saying
Could not find configuration node: PropertyStoreProvider/store[@name=’web2′] Could not find configuration node: eventing/eventQueueProvider/eventQueue[@name=’web2′]
And as I do really believe in our Sitecore community, ended up looking for the error in Sitecore.StackExchange and found the extra steps provided by Gatogordo
“Sitecore has added these things in the database config in Sitecore9. So in your case -for a “web2″ database-, add”
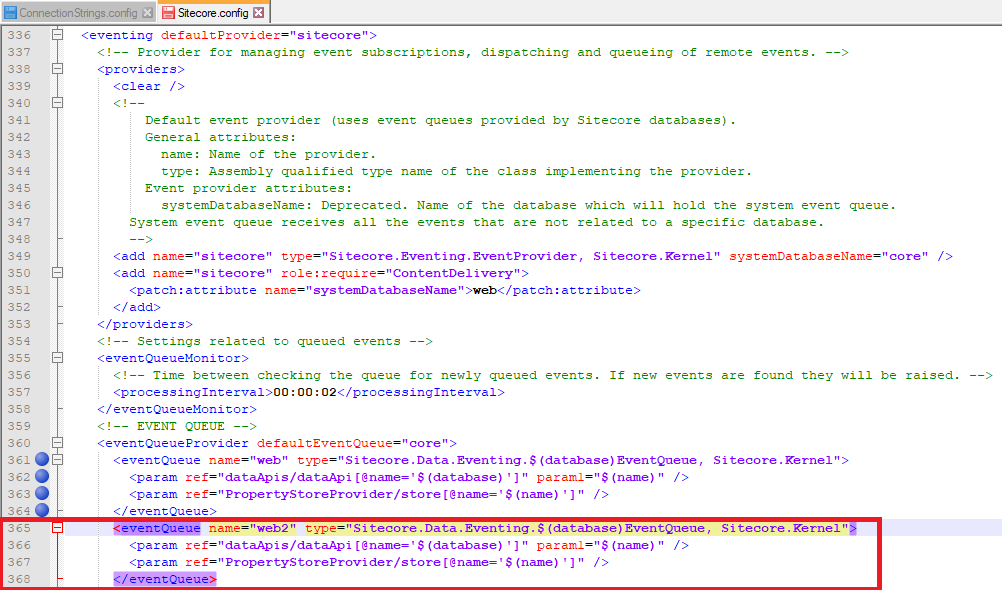
9. Open your Sitecore.config, and find the following entry eventQueue=”web” (around line 361), then copy those lines highlighted in the red square
10. And paste after the </eventQueue>, then modify the following entry <eventQueue name=”web” to <eventQueue name=”web2″