Azure · Sitecore
Sitecore Identity Server and Azure AD security groups limit part 3
Part 1 – A user was member of 180 Security Groups and after provide its credentials, it was either redirect to a HTTP 431 error page or a blank page but never to Sitecore Experience Platform.
Part 2 – User was member of 54 Security Groups, and after provide its credentials, it was receiving “You do not have access to the system. If you think this is wrong, please contact the system administrator” error. After further analysis, it seems the user belongs to nested groups that were exceeding the Azure AD integration limit.
Part 3 here we go… 🙂
- Decrease the number of groups some of your users are in
- Create a separate Azure Active Directory for managing just Sitecore groups
- Move the Sitecore permissions from the “Azure AD Security Groups” to “Azure AD Application Roles”
In order to get a confirmation about the Azure AD integration limit and have the analysis from Microsoft, and suggested by Sitecore as well, a ticket with Azure Support was opened.
Microsoft verified the user, and the total of groups totalized 350 because of the existence of nested group, as pointed by Sitecore support. In addition to that, they also confirmed the limitation with Azure AD.
In larger organizations the number of groups a user is a member of may exceed the limit that Azure Active Directory will add to a token. 150 groups for a SAML token, and 200 for a JWT. This can lead to unpredictable results. If your users have large numbers of group memberships, we recommend using the option to restrict the groups emitted in claims to the relevant groups for the application
https://docs.microsoft.com/en-us/azure/active-directory/hybrid/how-to-connect-fed-group-claims
And Microsoft also made a couple suggestions
- Azure AD Application Roles (same as suggested by Sitecore)
- Azure AD Application Registration for group attributes
SPOILER ALERT
Both suggestions work smoothly, however, the Azure AD Application Registration for group attributes has minimal disruption for the current flow as well as to the Active Directory configuration BUT it requires one of the following subscriptions in your Azure AD: Enterprise Mobility + Security E5 or Azure AD Premium P2.
Azure AD Application Roles
Assuming you’ve already configured Azure AD integration with Sitecore, let’s get things moving
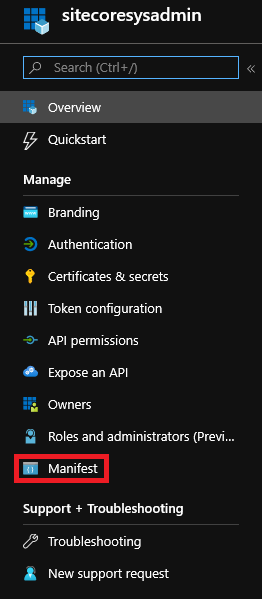
- In Azure, visit the App Registration and find the one you are using in your Sitecore Identity Server / Sitecore environment, then click on its Manifest
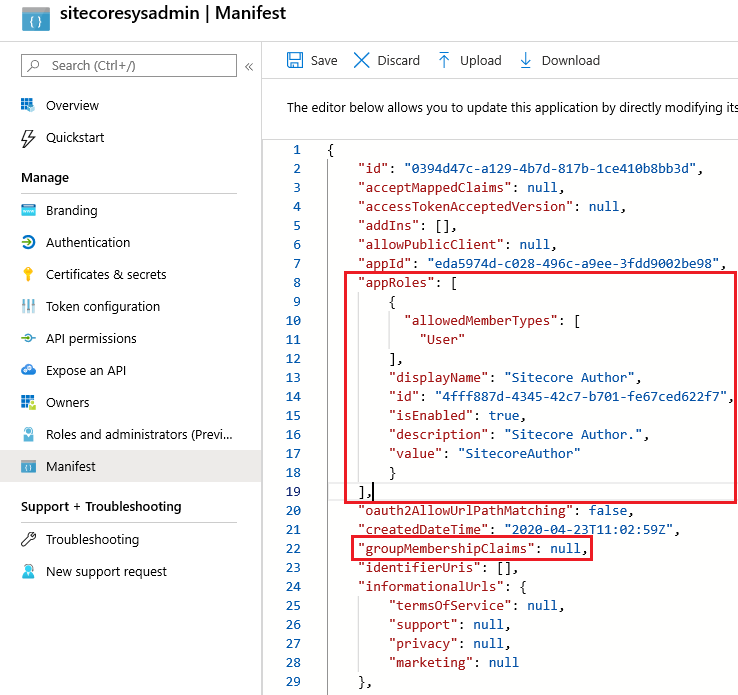
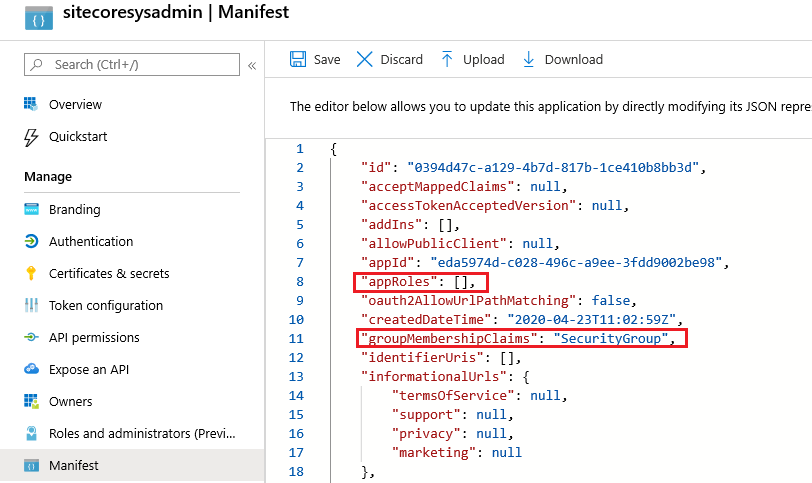
2. Currently, that’s how your Manifest should look like, and you’ll need to modify the highlight parameters in Manifest: appRoles and groupMembershipClaims
The appRoles will replace the need of Azure AD Security Groups to claim for Sitecore Roles, instead you are going to set everything you need inside of this parameter. And, since the Application is no longer look for Azure AD Security Groups, groupMembershipClaims parameter will be set as null.
“The displayName cannot contain spaces”
“The id must be a Unique GUID”
“The value property can’t contain spaces”
“The value property of each app role definition should exactly match the strings that are used in the code in the application”
https://docs.microsoft.com/pt-br/azure/active-directory/develop/howto-add-app-roles-in-azure-ad-apps
3. Now that you create the appRoles, and changed the Manifest, please go to Enterprise Applications
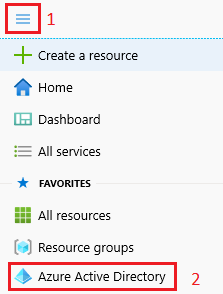
At your top left, click at the Portal Menu, then click Azure Active Directory
Once you open Azure AD, under Manage click at Enterprise Applications, then All Applications and select the application in which you want to assign users

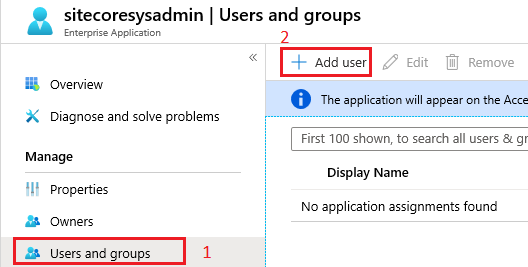
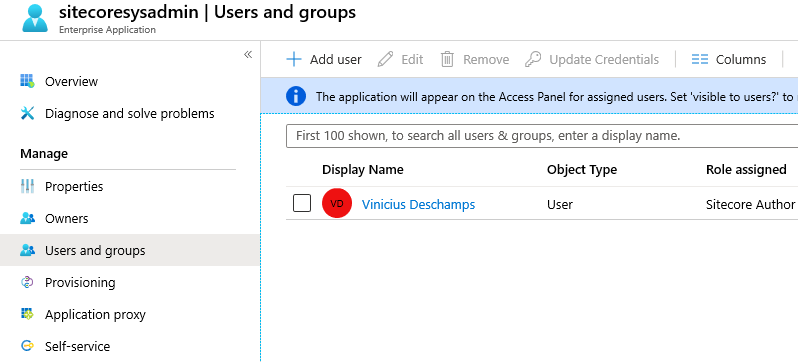
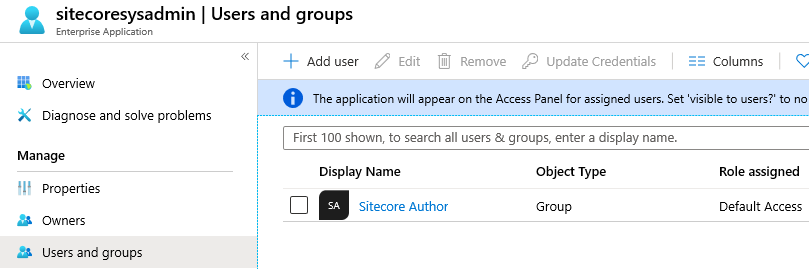
4. Select the Users and Groups pane in the application’s left-hand navigation menu, then select the Add user
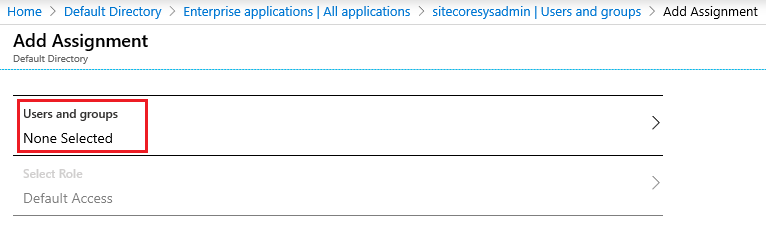
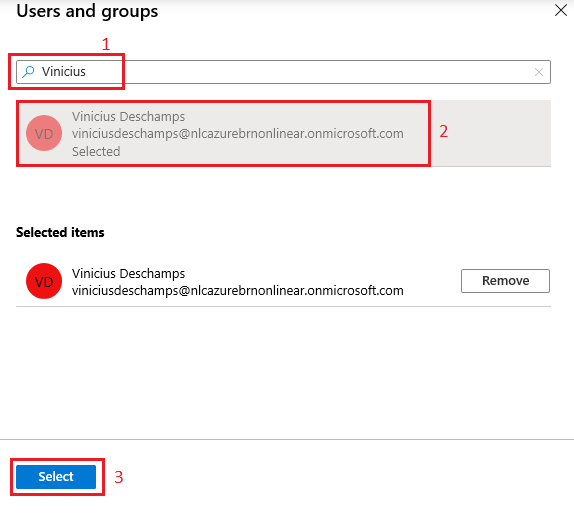
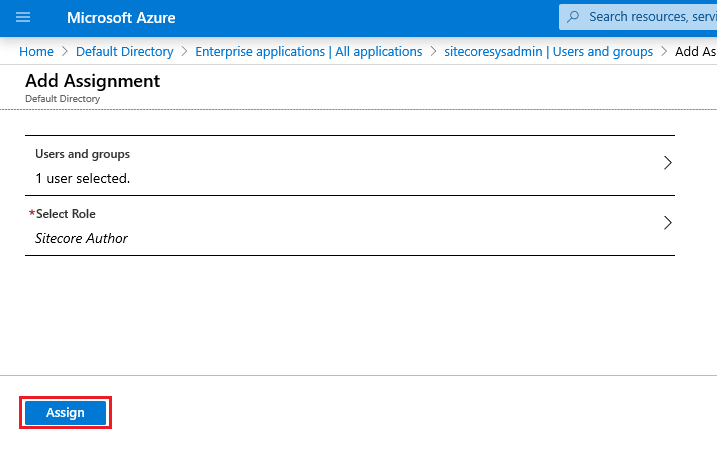
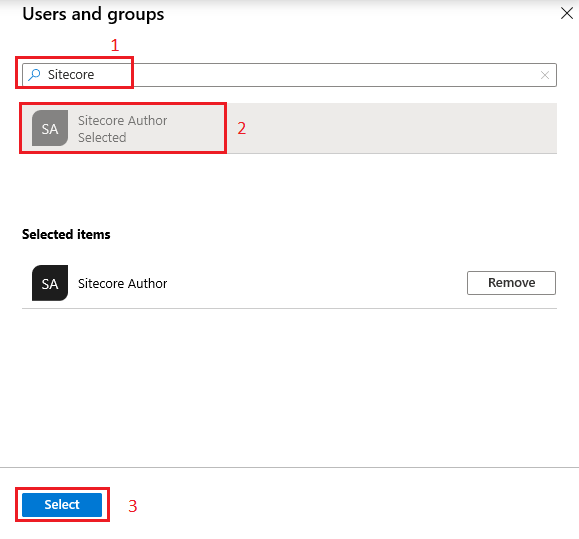
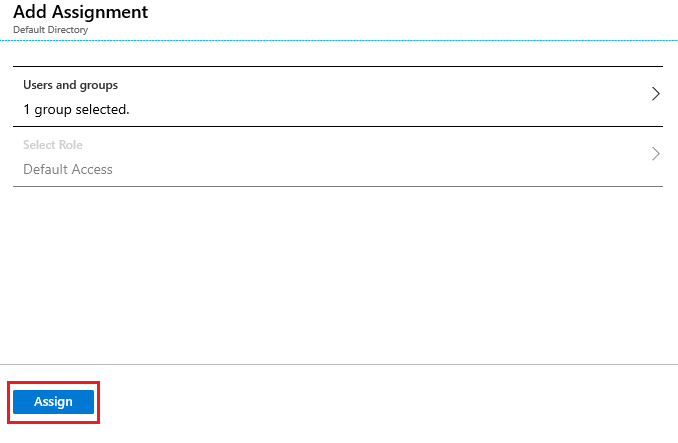
5. In the Add Assignment, click at Users and groups. A list of users will be shown along with a search field to locate and select the proper user
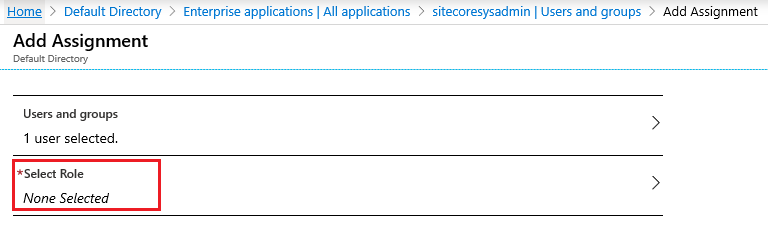
5. Once you are done selecting the user, you now need to choose Select Role in Add Assignment. All the roles declared earlier in the app manifest will show up along with a search field to locate and select the proper role
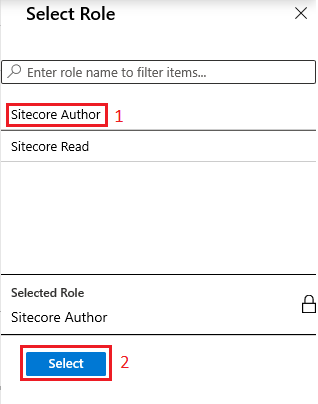
6. Finally, you have to click in the Assign button at Add Assignment
Tip
If by any chance you need to assign multiple roles per user, you must add the user twice, or three, four times, depending the number of roles you want to assign, and assign roles individually to each of duplicated users.
Alright, from Azure perspective you are done, so let’s move to Sitecore changes since adjustments are required in Sitecore.Plugin.IdentityProvider.AzureAd.xml
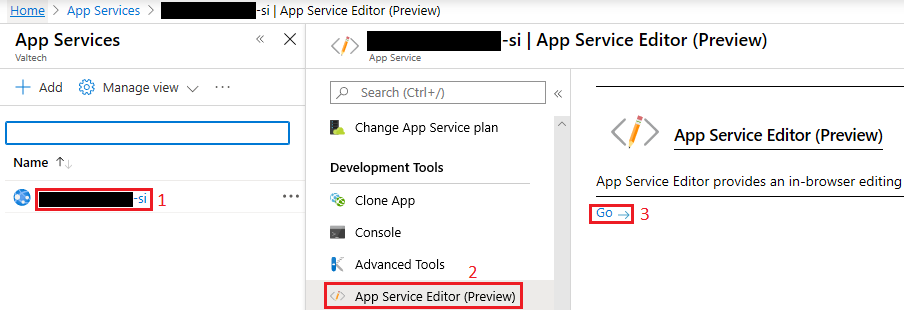
7. Navigate to your App Services, click on the Sitecore Identity App Service, and look for App Service Editor, then click Go
8. In the App Service Editor navigate to sitecore\Sitecore.Plugin.IdentityProvider.AzureAd\Config and click Sitecore.Plugin.IdentityProvider.AzureAd.xml

9. At your right, the file shows up and you have to modify a couple parameters
Let’s first show how the file is currently
<SourceClaims>
    <Claim1 type="groups" value="33ccc70e-c375-4dcc-a7be-48de24a40f1b" />
 </SourceClaims>
 <NewClaims>
    <Claim1 type="role" value="sitecore\Author" />
 </NewClaims>
And here is the modified version
<SourceClaims>
    <Claim1 type="http://schemas.microsoft.com/ws/2008/06/identity/claims/role" value="SitecoreAuthor" />
</SourceClaims>
<NewClaims>
    <Claim1 type="role" value="sitecore\Author" />
</NewClaims>
Basically, the SourceClaims’ type parameter changed from “group” to “http://schemas.microsoft.com/ws/2008/06/identity/claims/role”, and the SourceClaims’ value parameter should exactly match the strings that are used in the code in the application, so it changed from Azure AD Security Group GUID to the value defined at the App Registration Manifest.
Tip
Your file probably contain a lot of SourceClaims, and up to now, using Azure Security Group GUID, so instead of using a String in your value parameter App Registration Manifest, please consider to use the existent Azure AD Security Group GUID for each appRole you have to create, because to modify the file will require less effort.
10. Once you modified everything, restart your Sitecore Identity Server and check if you are able to properly login using Azure AD
Azure AD Application Registration for group attributes
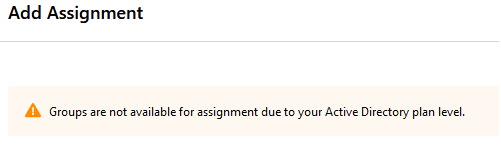
Important note!
You must have one of the following specific subscription associated with your Azure AD: Enterprise Mobility + Security E5 or Azure AD Premium P2, otherwise you will find yourself stuck during the Add Assignment step
- In Azure, visit the App Registration and find the one you are using in your Sitecore Identity Server / Sitecore environment, then click on its Manifest
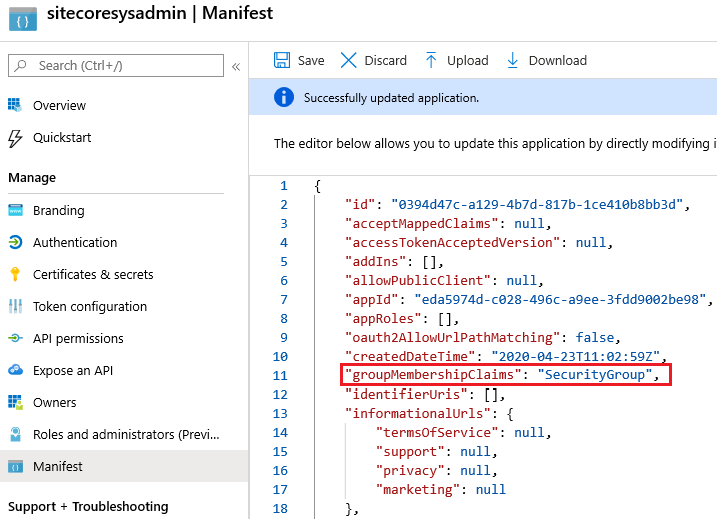
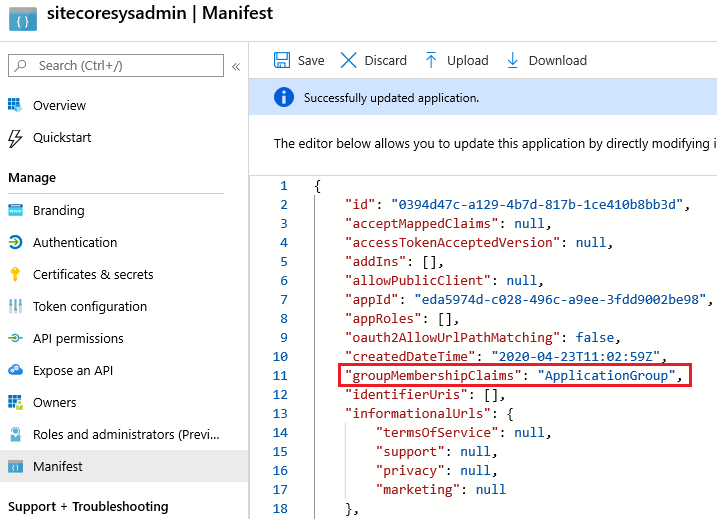
2. Currently, that’s how your Manifest should look like, and you’ll need to modify the highlight parameters in Manifest: groupMembershipClaims
At this time, Azure AD Security Groups are still needed but the difference is that instead of having the application to look for all of them, we want to only emit the groups that are explicity assigned to the application and the user is member of, so groupMembershipClaims parameter will be set as ApplicationGroup.
3. Now that modified the groupMembershipClaims, and changed the Manifest, please go to Enterprise Applications
At your top left, click at the Portal Menu, then click Azure Active Directory
Once you open Azure AD, under Manage click at Enterprise Applications, then All Applications and select the application in which you want to assign users
4. Select the Users and Groups pane in the application’s left-hand navigation menu, then select the Add user
5. In the Add Assignment, click at Users and groups. A list of users and groups will be shown along with a search field to locate and select the proper group
6. Finally, you have to click in the Assign button at Add Assignment
As you might have multiple Azure AD Security Groups and Enterprise Application consider using a Powershell Script to accomplish it
$azureAdGroups = Get-Content .\AzureADGroups.txt
$enterpriseApplication = Get-Content .\EnterpriseApplication.txt
foreach ($eaId in $enterpriseApplication)
{
	$getEnterpriseApplication = Get-AzureADServicePrincipal -Filter "DisplayName eq '$eaId'"
	foreach ($securityGroups in $azureAdGroups)
	{
		$getGroups = Get-AzureADGroup -Filter "DisplayName eq '$securityGroups'"
		try {
				New-AzureADGroupAppRoleAssignment -ObjectId $getGroups.ObjectId -PrincipalId $getGroups.ObjectId -ResourceId $getEnterpriseApplication.ObjectId -Id ([Guid]::Empty) | out-null
				try {
					New-AzureADGroupAppRoleAssignment -ObjectId $getGroups.ObjectId -PrincipalId $getGroups.ObjectId -ResourceId $getEnterpriseApplication.ObjectId -Id ([Guid]::Empty) | out-null
				}
				catch {
					Write-Host -NoNewLine -Foreground Green $getGroups.DisplayName "successfully added to" $getEnterpriseApplication.DisplayName "`n"
				}
		}
		catch {
			Write-Host -NoNewLine -Foreground Yellow $getGroups.DisplayName "already exists in" $getEnterpriseApplication.DisplayName "`n"
		}
    }
}
As soon as you finish adding the Azure AD Security Groups to the Enterprise Application, try to access Sitecore using your Azure AD credentials, it should work right away… and we are done!
I hope you liked it, and I’ll see you on my next post!
Photo by Paule Knete on Unsplash