
Azure
Azure Alerts
La gente suele discrepar conmigo, pero nadie quiere ser el último en enterarse, así que deberías considerar usar Azure Alerts para tu entorno, ¿me equivoco?
You can have since the well-known alerts like watch CPU percentage, memory utilization, up to watch a specific error happens in your environment.
Monitor
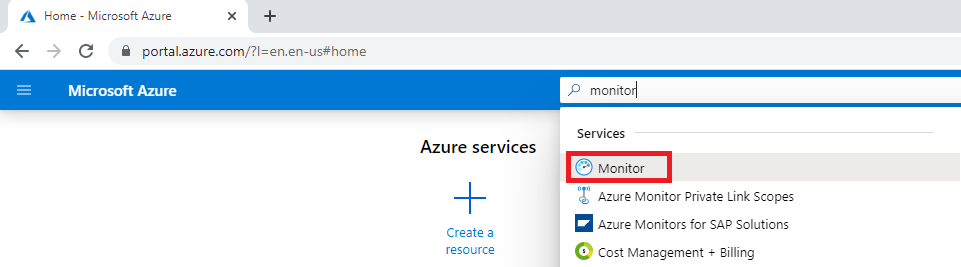
In Azure Portal, you can use the main search field, and type Monitor, select it and click at Alerts
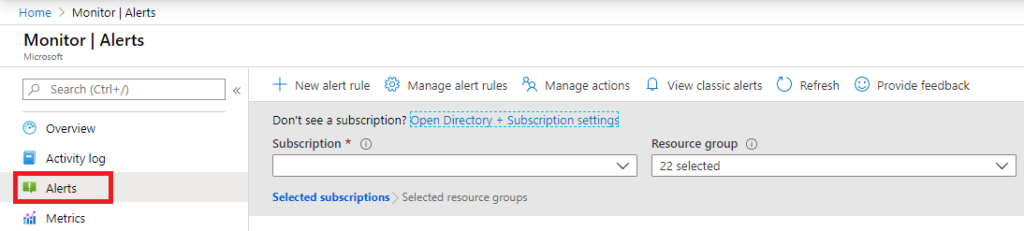
Bajo Alerts, encontrarás las siguientes opciones New alert rule, Manager alert rules y Manage actions.
Con el propósito de la explicación, voy a saltar primero a Manage Actions y luego a New Alert Rules, y finalmente Manage Alert Rules
Manage Actions
Manage Actions proporciona la posibilidad de determinar los canales que se van a usar para enviar notificaciones a las personas (email, sms, voz) y si también se dispararán acciones automáticas cuando se genere una alerta.
Basics
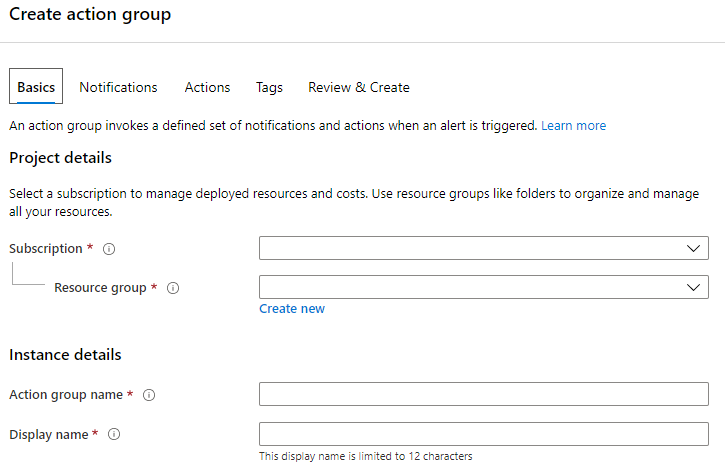
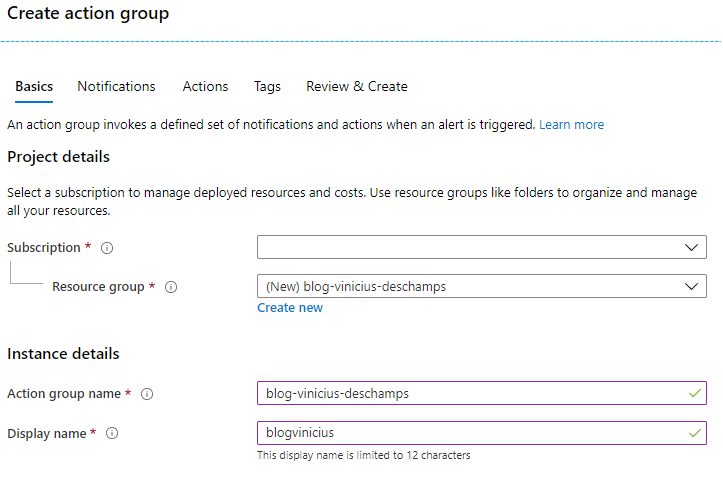
Primero, proporcionarás la información de Basics para crear el Action Group, el Resource Group, un Action Group Name y un Display Name
Notifications
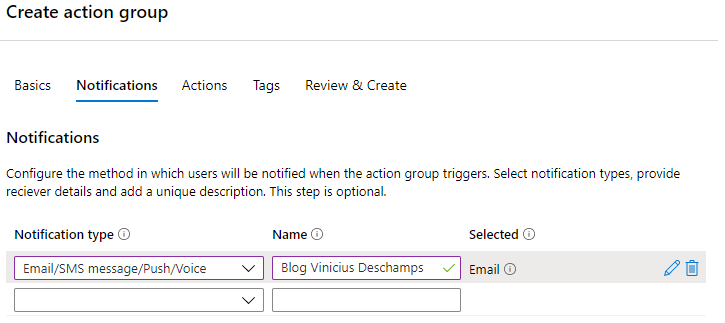
Es hora de establecer la forma en que este Action Group será notificado, así que debes elegir Notification Type y un nombre único para él
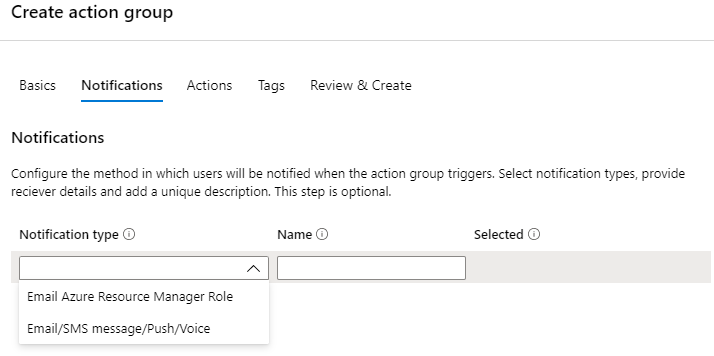
Notification type
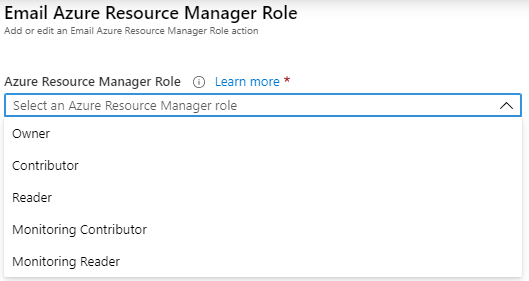
Email Azure Resource Manager Role
Puedes elegir enviar correo a los miembros del rol de la suscripción. Es posible elegir entre Owner, Contributor, Reader, Monitoring Contributor y Monitoring Reader.
Email/SMS message/Push/Voice
Puedes elegir enviar email, sms message, push y voice.
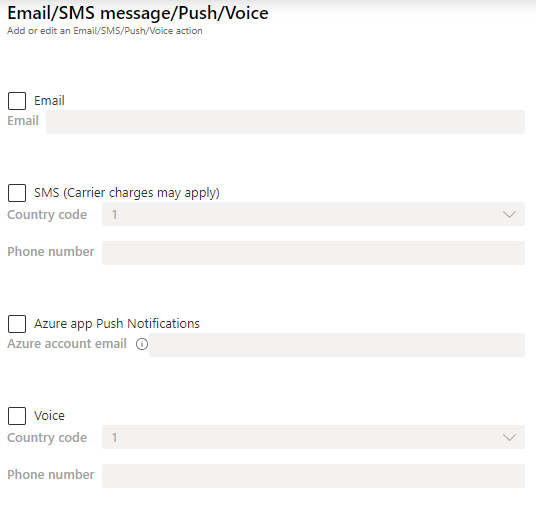
If the Azure portal action group user interface does not let you select your country code, then SMS or/and Voice is not supported for your country
https://docs.microsoft.com/en-us/azure/azure-monitor/platform/action-groups#sms
Además, puedes tener múltiples Notification type por Action Group, por ejemplo, he configurado para enviar email y para notificar a los Owners de la suscripción.

Actions
Este paso no es obligatorio para recibir notificaciones, pero vale la pena conocerlo, porque puedes configurar Actions para que se realicen una vez que se disparen las alertas.
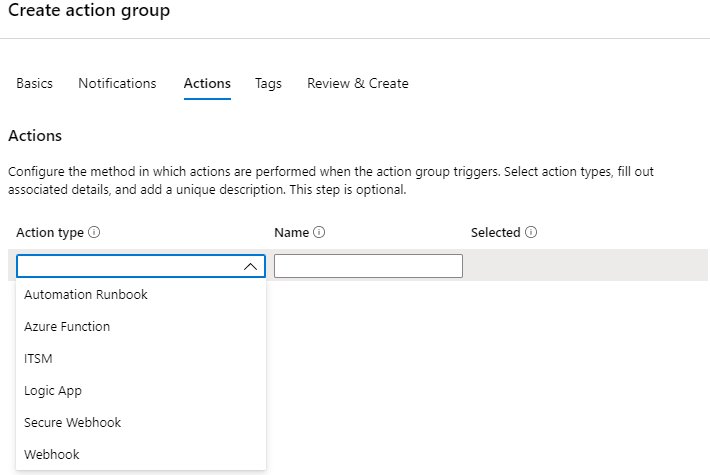
En resumen, puedes configurar una acción para registrar un ticket en tu sistema ServiceNow, o tal vez el error podría solucionarse reiniciando la VM, o muchas otras opciones con todos los demás Action Type disponibles.
Create Action Group
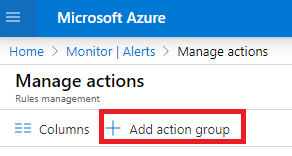
En la pestaña Monitor haz clic en Alerts y luego en Manage Actions
En la sección Basics, elige un Resource Group o Create new, y proporciona un Action group name así como Display name, luego haz clic en Notifications
En Notifications, elige un Notification type y proporciona un unique Name

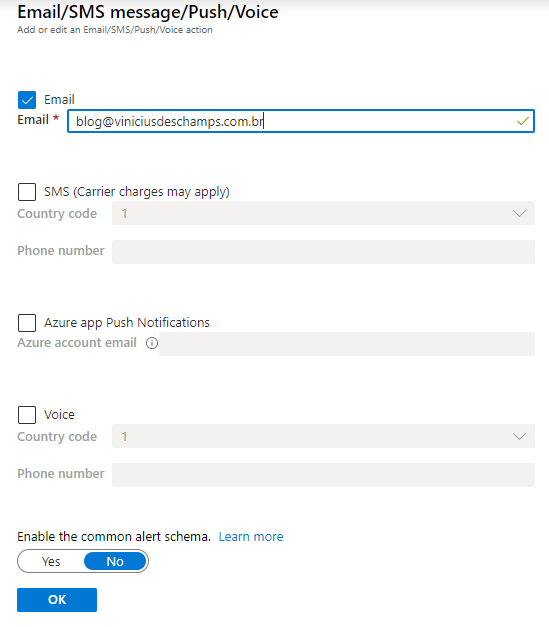
Tan pronto como selecciones el Notification type, aparecerán algunas opciones en tu lado derecho y debes elegir entre Email, SMS, Azure App Push y Voice, y finalmente presionar OK
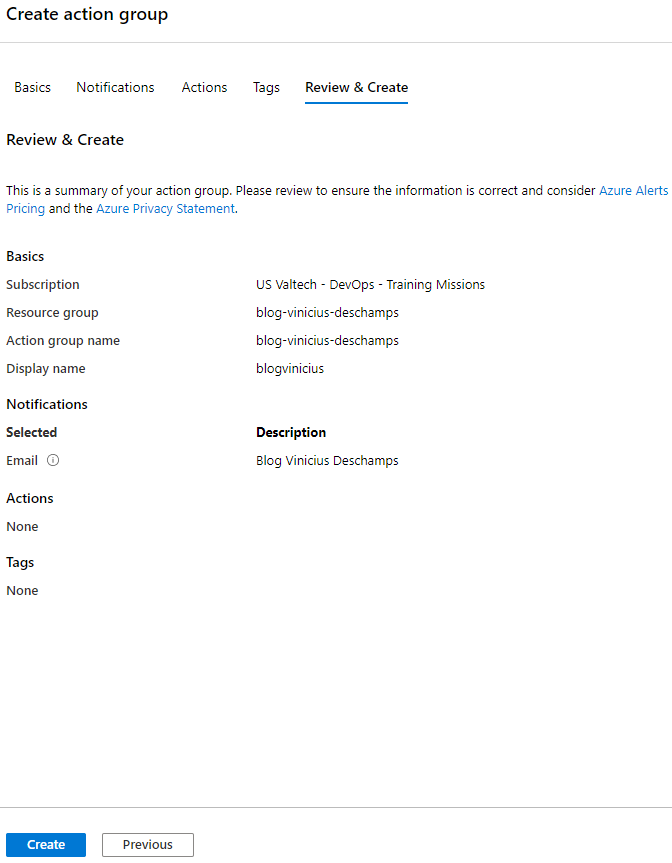
Como solo queremos un Action Group simple, vamos a omitir Actions y Tag, y vamos directamente a Review & Create
Revisa la información proporcionada en esta pantalla y pulsa Create
Ahora, que ya tienes tu Action Group, vamos a crear una nueva regla, luego gestionarla.
New Alert Rule
Aquí vas a crear reglas de alerta, determinar umbrales, definir qué debe Azure vigilar en tu behalf y seleccionar a las personas – Action Groups – que serán notificadas cuando se active la alerta.
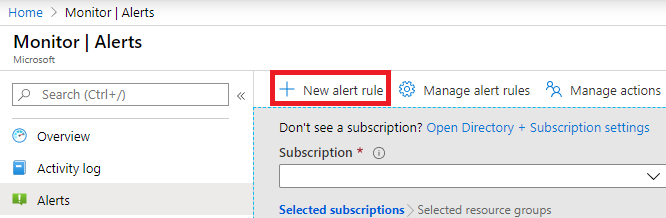
En Monitor, debes hacer clic en Alerts, luego New alert rule
The Create Alert Rule needs to be filled accordingly to the rule you want to create but the requirements are
Scope
Will point the resource you want to Monitor
Condition
How would you want the alert to be triggered
Action Group
Simple selecting which Action Groups should be prompted when a condition is met
Alert rule details
Will help to find and identify the rule later on
Creating Alert Rule
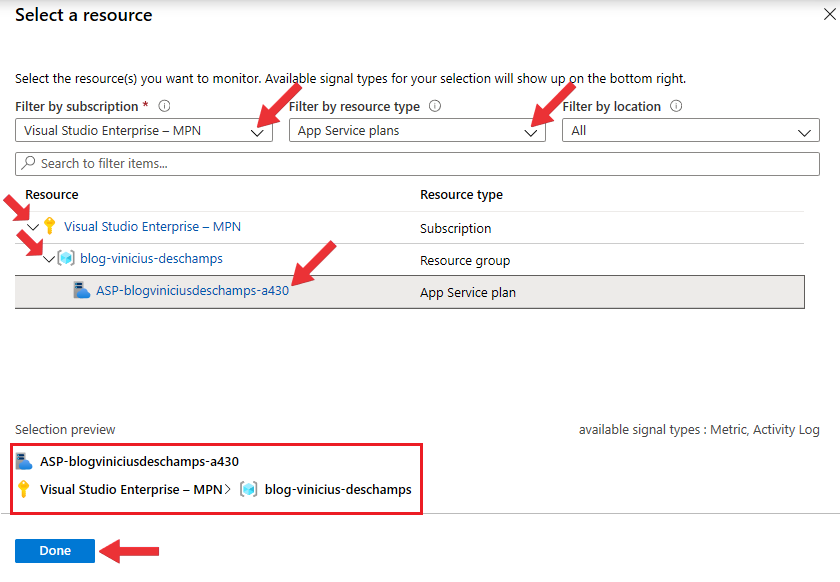
First of all, you need to select a resource, in my example, I’m going to create an alert for High CPU utilization, so here is how my selections will look like.
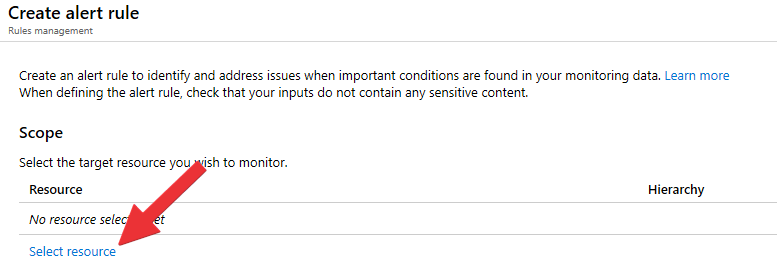
In the Create alert rule, under Scope click Select resource
Filter by subscription – ensure I choose the Subscription I want to find my resource is selected
Filter by resource type – App Services plan
Filter by location – this is helpful when you have multiple region resource groups
And of course you can use the Search field to look for the resource.
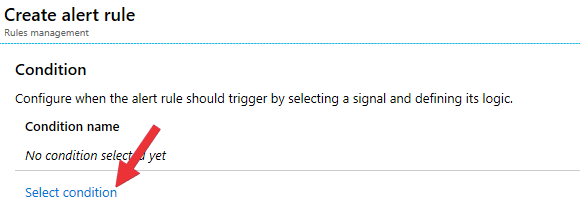
Once you choose the resource, you need to Select a Condition
Since I selected App Plan in the previous step, the options presented are designed for this specific resource. Let’s choose CPU Percentage
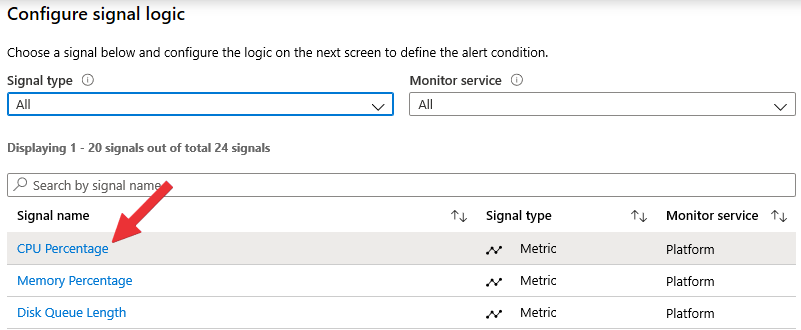
Then you will be presented with the CPU Percentage options
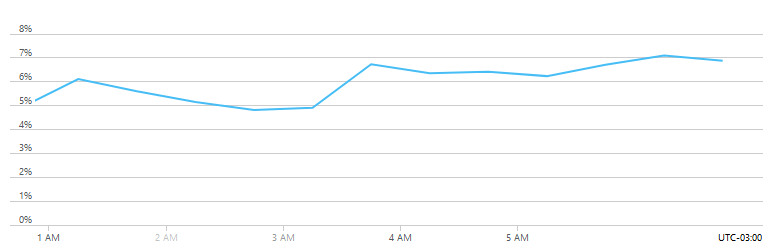
The first thing to notice is the graphic with the CPU percentage from the resource chosen in the Scope step, and it will be very helpful while setting the threshold
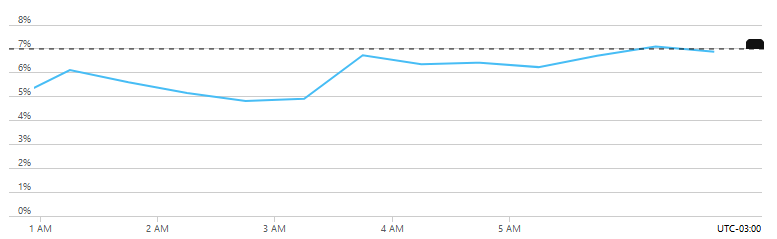
Here is an example how the graphic is important while setting the threshold. I have set a 7% threshold, and the dashed line shows how the limit would trigger my alerts.
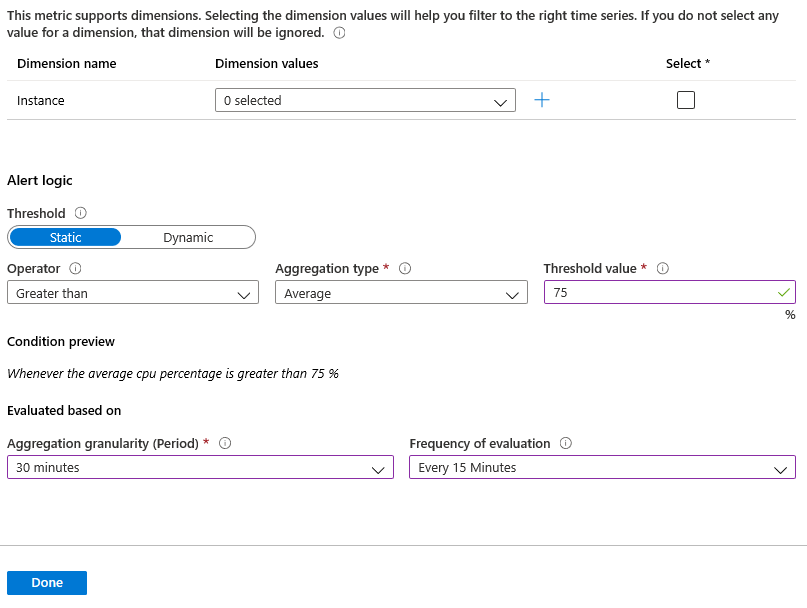
Dimension is important when you want to monitor multiple instances running your website with the same rule.

En Alert logic, you will choose the way conditions should be in order to generate an alert state
Threshold
a) Static, como su nombre indica, es un valor fijo definido por el administrador
b) Dynamic, se calcula utilizando datos históricos mediante un algoritmo de aprendizaje automático (learn more)
Operator
Aquí defines si el valor del umbral debe ser: Greater than, Less than o Greater or Less than
Aggregation type
Qué valores deben considerarse: Average, Maximum, Minimum, Total o Count
Threshold value
El propio valor y formará parte de la expresión para activar la alerta

Y el Evaluated based on que define cómo se monitorizará la condición
Aggregation granularity (Period)
La ventana de look back sobre la que se verifican los valores de la métrica
Frequency of evaluation
La frecuencia con la que se verifica si se cumplen las condiciones

Ahora, voy a establecer los valores para crear la Condition, y presionar Done
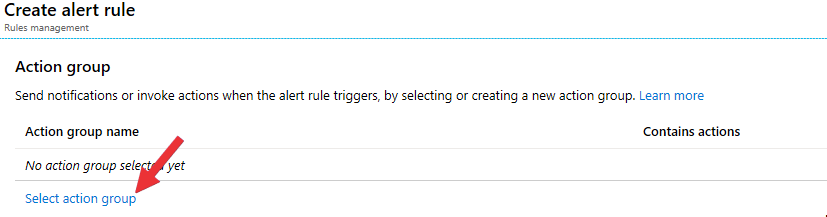
Vamos a añadir un Action Group haciendo clic en select action group
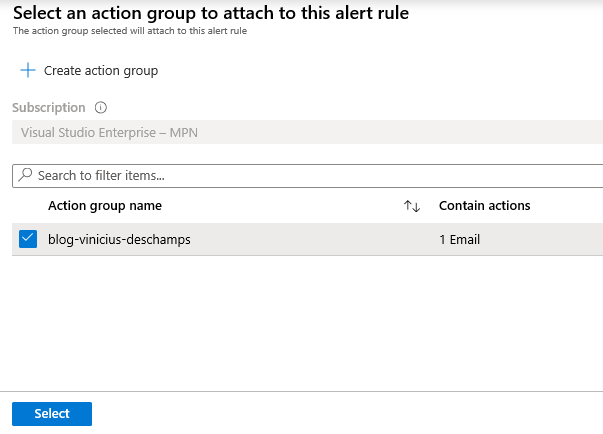
Select an action group to attach this alert rule aparecerá, y como el Action Group fue creado anteriormente, marca la casilla junto al nombre del grupo de acciones y pulsa Select
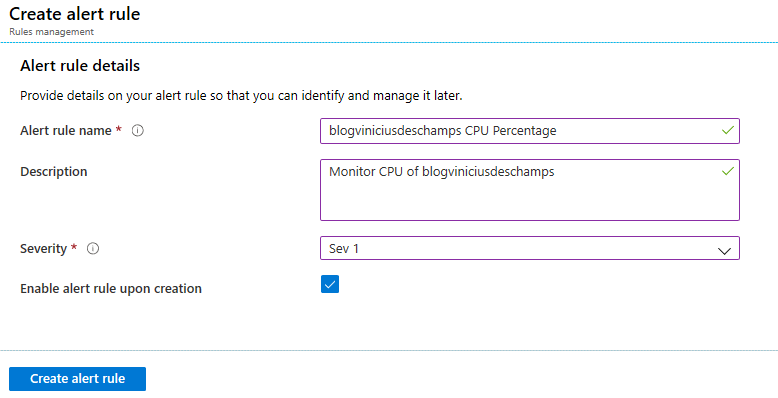
Finalmente, es hora de proporcionar Alert rule details
Alert rule name
Te permite identificar la regla y encontrarla fácilmente luego en Manage Alert Rules
Description
Es un valor opcional, pero puede ayudar a entender mejor el uso de una regla
Severity
Indica la severidad de la alerta cuando se activa, que se mostrará en el asunto del correo y también en la vista de Alertas en Azure
Manage Alert Rules
Podrás ver todas las reglas existentes, y también buscar fácilmente una regla específica, así como hacer clic en ella para ver cómo se ha definido la regla y modificar detalles si es necesario
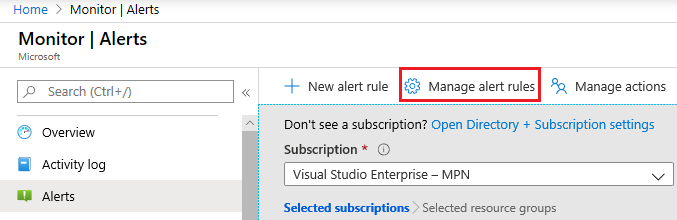
En Monitor, debes hacer clic en Alerts, luego Manage alert rules
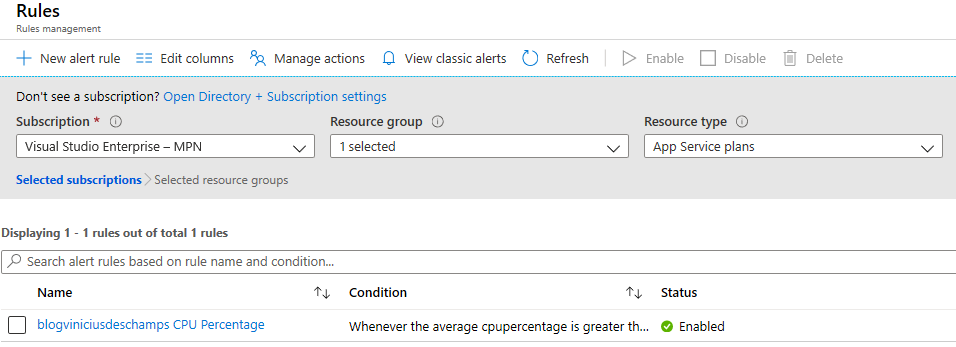
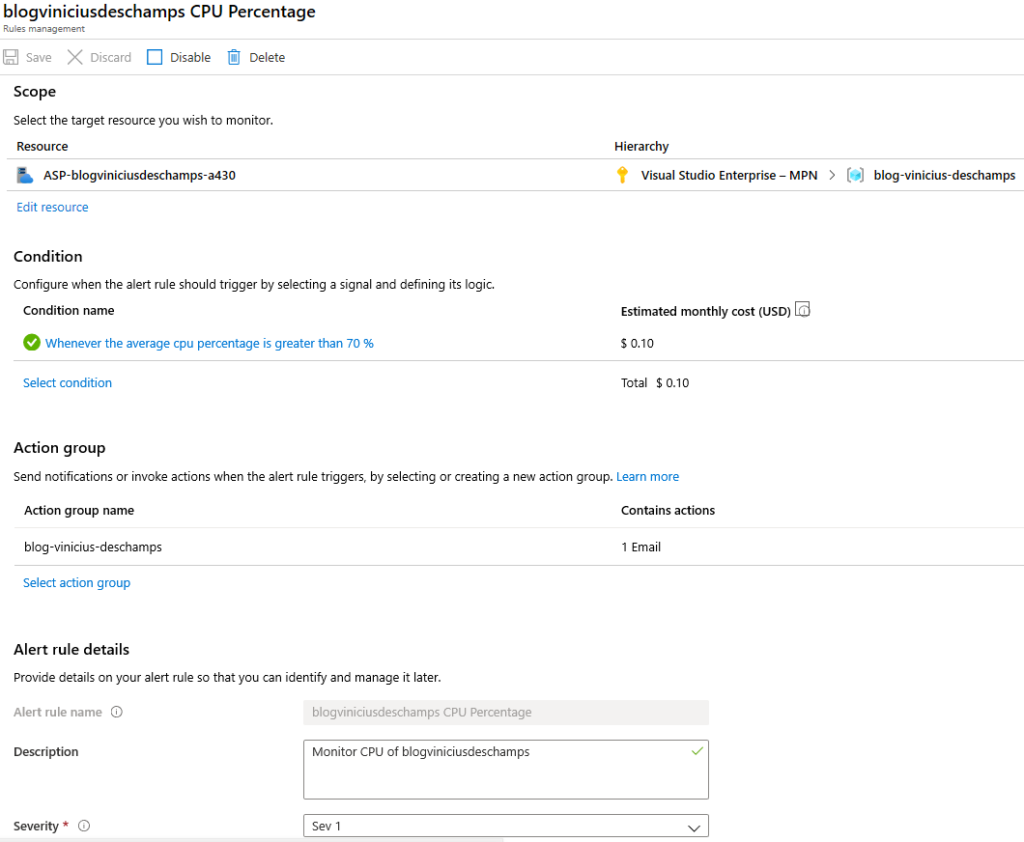
Haciendo clic en blogviniciusdeschamps CPU Percentage, verás y podrás modificar las siguientes cosas: Condition, Action group, Description y Severity.
Espero que te haya gustado, y nos vemos en mi próximo post.
Photo by Matt Ridley on Unsplash