People often disagree with me but nobody wants to be the last to know, so you should consider to use Azure Alerts for your environment, am I right?
You can have since the well-known alerts like watch CPU percentage, memory utilization, up to watch a specific error happens in your environment.
Monitor
In Azure Portal, you can use the main search field, and type Monitor, select it and click at Alerts


Under Alerts, you will find the following options New alert rule, Manager alert rules and Manage actions.
For the purpose of the explanation, I’m going to jump first to Manage Actions and then to New Alert Rules, and finally Manage Alert Rules
Manage Actions
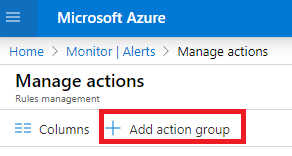
Manage Actions provides the ability to determine the channels which are going to be used to send notification to people (email, sms, voice) and if automatic actions will also be triggered whenever alert is produced.
Basics
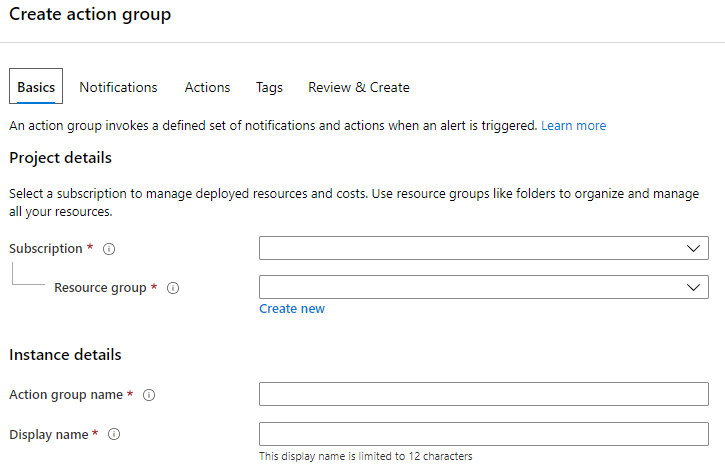
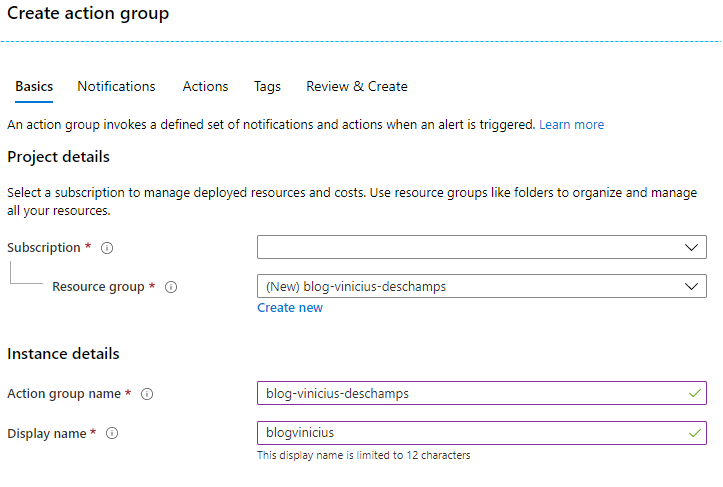
First, you will provide the Basics information to create the Action Group, the Resource Group, an Action Group Name and a Display Name
Notifications
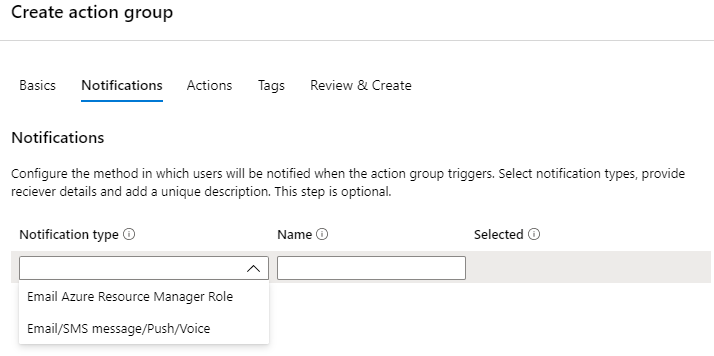
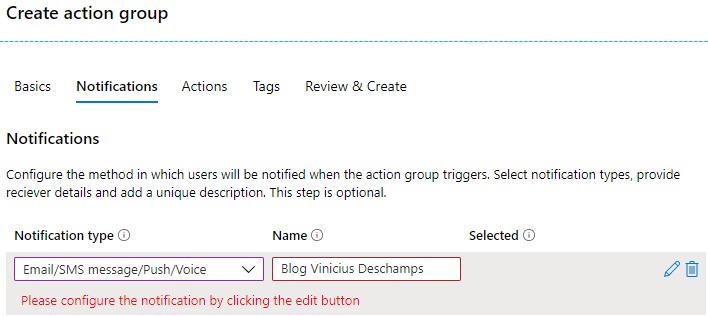
It’s time to set the way this Action Group is going to be notified, so you have to choose Notification Type and a unique name for it
Notification type
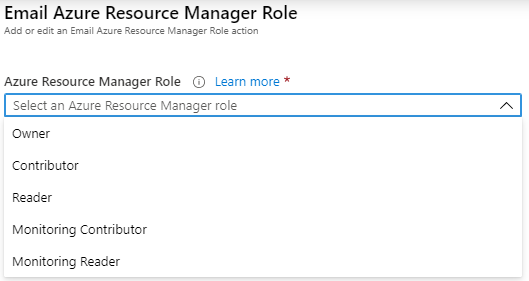
Email Azure Resource Manager Role
You can choose to send email to the members of the subscription’s role. It’s possible to choose Owner, Contributor, Reader, Monitoring Contributor and Monitoring Reader.
Email/SMS message/Push/Voice
You can choose to send email, sms message, push and voice.
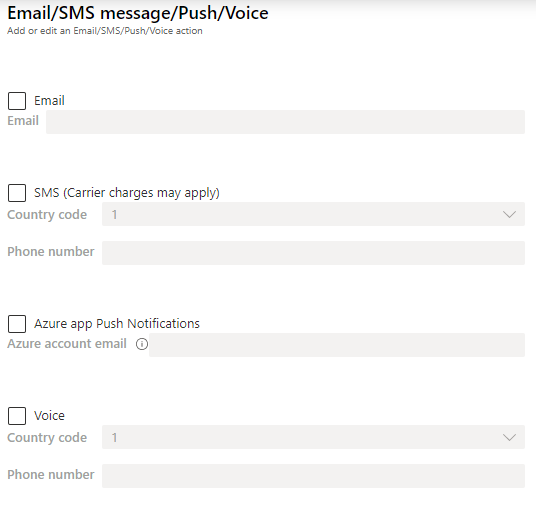
If the Azure portal action group user interface does not let you select your country code, then SMS or/and Voice is not supported for your country
https://docs.microsoft.com/en-us/azure/azure-monitor/platform/action-groups#sms
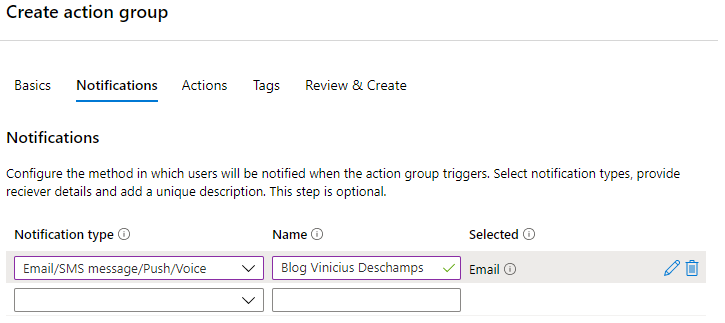
Also, you can have multiple Notification type per Action Group, for example, I have set to send email and to notify the Owners of the subscription.

Actions
This isn’t a required step to receive notifications but still worth to know, because you can configure Actions to be performed once alerts are triggered.
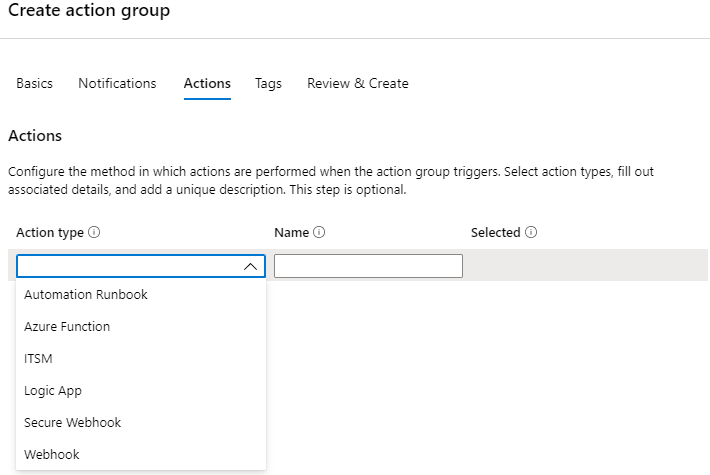
In summary, you can set an action to either register a ticket into your ServiceNow system, or maybe the error could be addressed by Restarting the VM, or plenty other options with all other Action Type available.
Create Action Group
In the Monitor blade click at Alerts and then Manage Actions

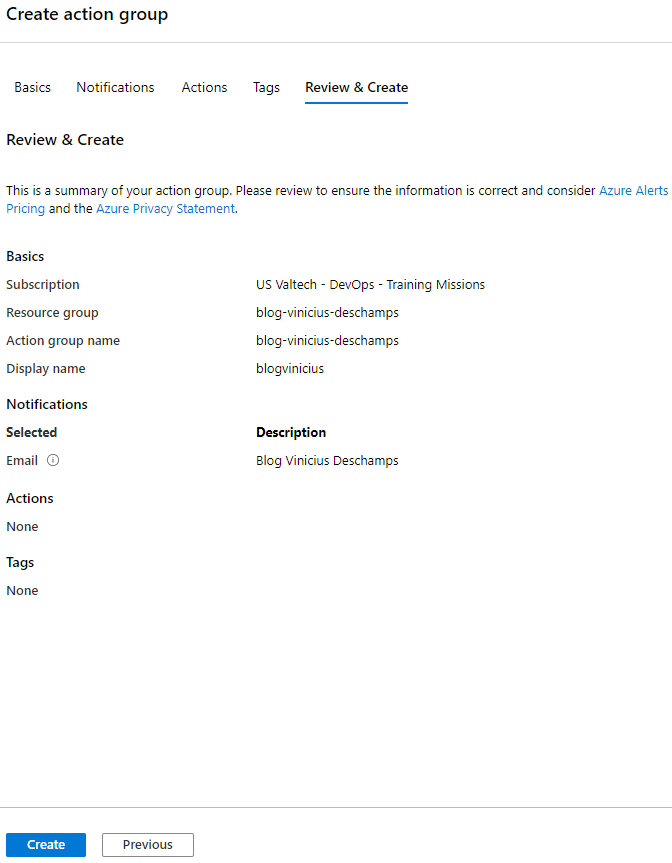
In the Basics information, choose a Resource Group or Create new, and provide an Action group name as well as Display name, then click Notifications
At the Notifications, choose a Notification type and provide a unique Name
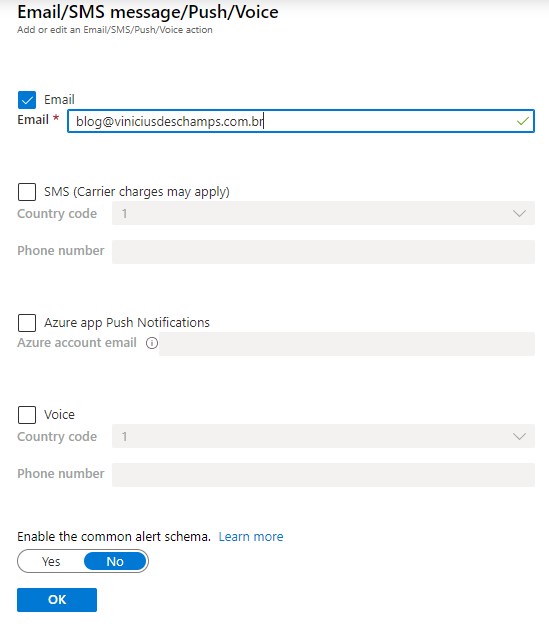
As soon as you choose the Notification type, some options will popup at your right and you have to choose between Email, SMS, Azure App Push and Voice, and finally press OK
Since we just want a simple Action Group let’s skip Actions and Tag, and go directly to Review & Create
Review the information provided at this screen, and press Create
Now, that you have your Action Group, let’s create a new rule, then manage it.
New Alert Rule
Here you are going to create alert rules, determine thresholds, set what Azure should keep an eye on your behalf and select the people – Action Groups – who is going to be notified whenever the alert is triggered.
In Monitor, you should click on Alerts, then New alert rule

The Create Alert Rule needs to be filled accordingly to the rule you want to create but the requirements are
Scope
Will point the resource you want to Monitor
Condition
How would you want the alert to be triggered
Action Group
Simple selecting which Action Groups should be prompted when a condition is met
Alert rule details
Will help to find and identify the rule later on
Creating Alert Rule
First of all, you need to select a resource, in my example, I’m going to create an alert for High CPU utilization, so here is how my selections will look like.
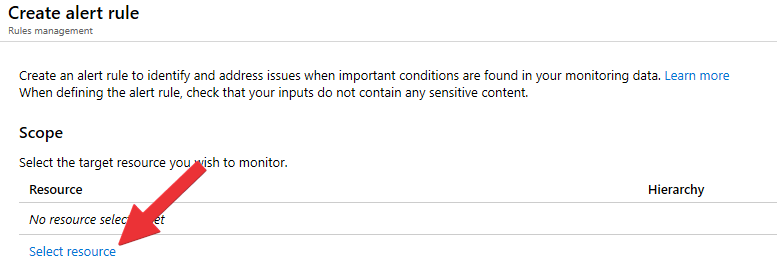
In the Create alert rule, under Scope click Select resource
Filter by subscription – ensure I choose the Subscription I want to find my resource is selected
Filter by resource type – App Services plan
Filter by location – this is helpful when you have multiple region resource groups
And of course you can use the Search field to look for the resource.
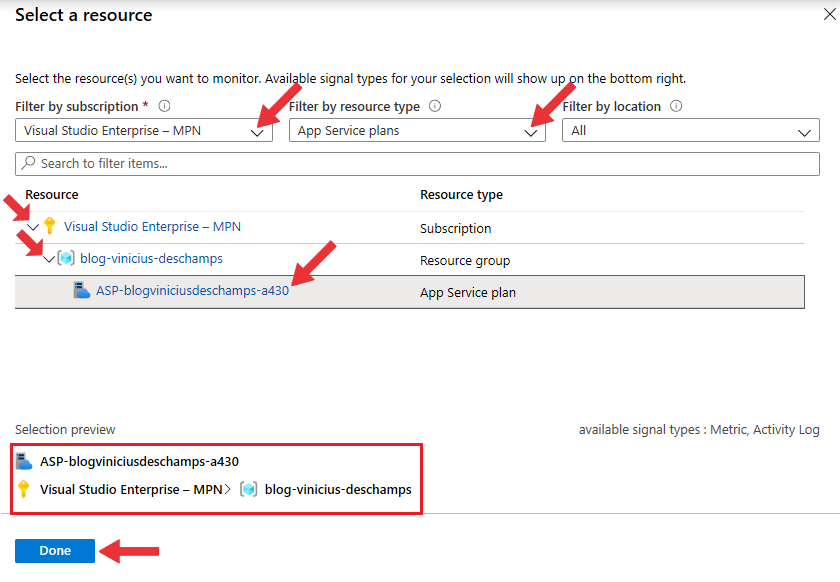
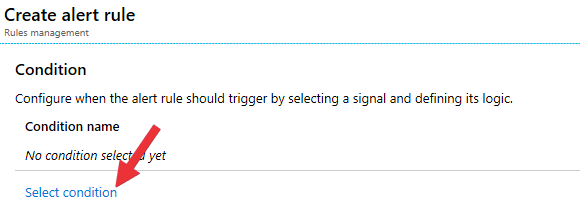
Once you choose the resource, you need to Select a Condition
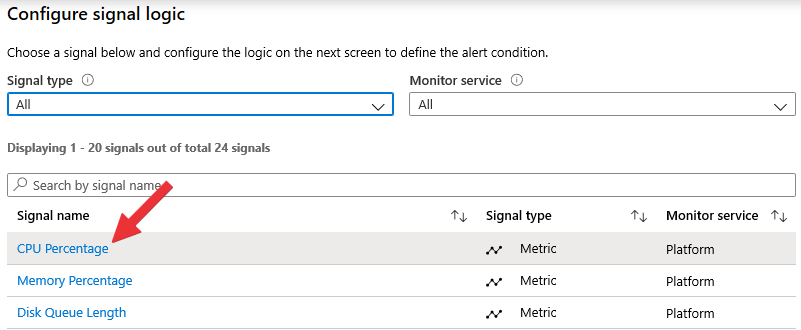
Since I selected App Plan in the previous step, the options presented are designed for this specific resource. Let’s choose CPU Percentage
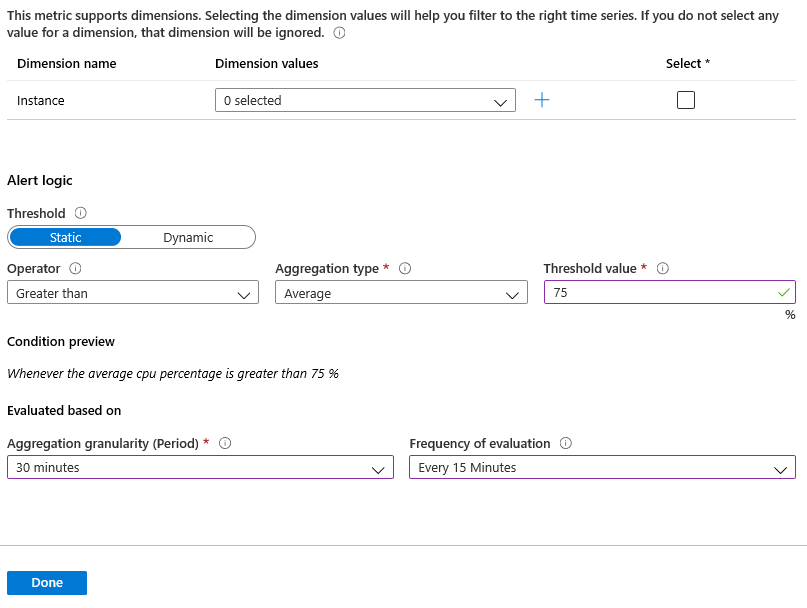
Then you will be presented with the CPU Percentage options
The first thing to notice is the graphic with the CPU percentage from the resource chosen in the Scope step, and it will be very helpful while setting the threshold

Here is an example how the graphic is important while setting the threshold. I have set a 7% threshold, and the dashed line shows how the limit would trigger my alerts.

Dimension is important when you want to monitor multiple instances running your website with the same rule.

In Alert logic, you will choose the way conditions should be in order to generate an alert state
Threshold
a) Static, as the name suggests, it is a fixed value defined by administrator
b) Dynamic, is calculated using historical data by machine learning algorithm (learn more)
Operator
Here you define whether the threshold value should be: Greater than, Less than or Greater or Less than
Aggregation type
Which values should be consider: Average, Maximum, Minimum, Total or Count
Threshold value
The value itself and will be part of the expression to trigger the alert

And the Evaluated based on that define how the condition will be monitored
Aggregation granularity (Period)
The look back window over which metric values are checked
Frequency of evaluation
The frequency with which metric alerts checks if the conditions are met

Now, I’m going to set the values to create the Condition, and press Done
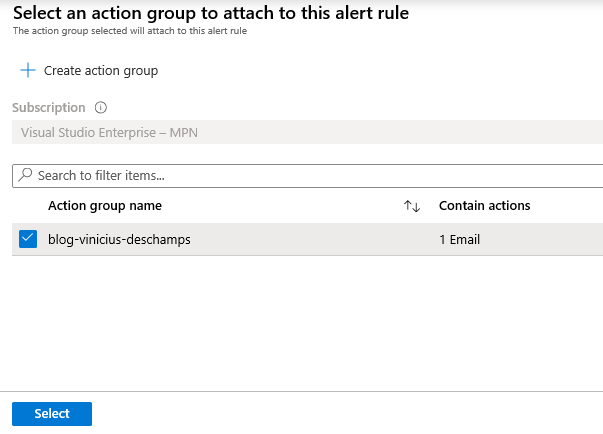
Let’s the add an Action Group by clicking select action group

Select an action group to attach this alert rule will show, and as the Action Group was created earlier, check the box near to the action group name and press Select
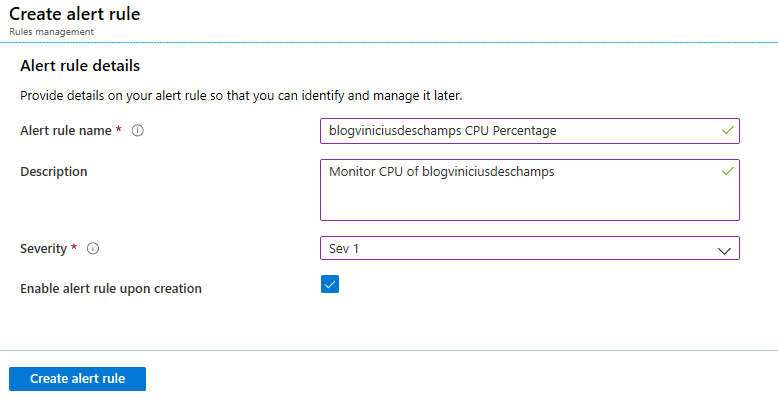
Finally, it’s time to provide Alert rule details
Alert rule name
Allows you to identify the rule, and easily find after in Manage Alert Rules
Description
It is an optional value, but it can be helpful to better understand the usage of a rule
Severity
Indicates the severity of the alert when it is triggered that will be shown in the email subject as well as in the Alerts overview in Azure
Manage Alert Rules
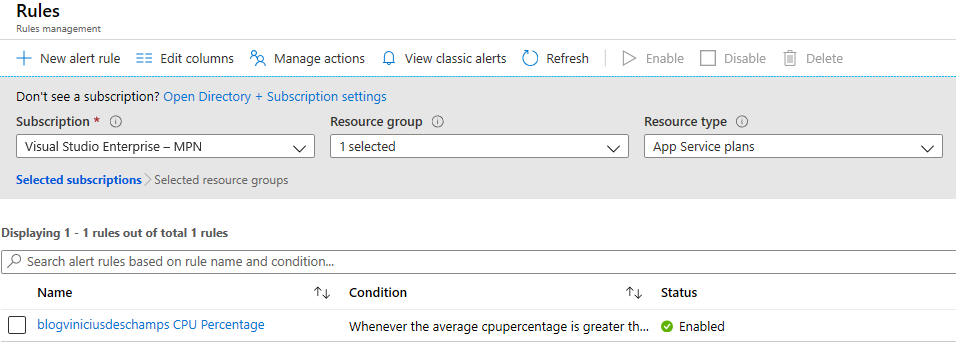
You will be able to see all existent rules, and you can easily search for a specific rule as well as click on it to see how the rule has been defined and modify details if needed
In Monitor, you should click on Alerts, then Manage alert rules

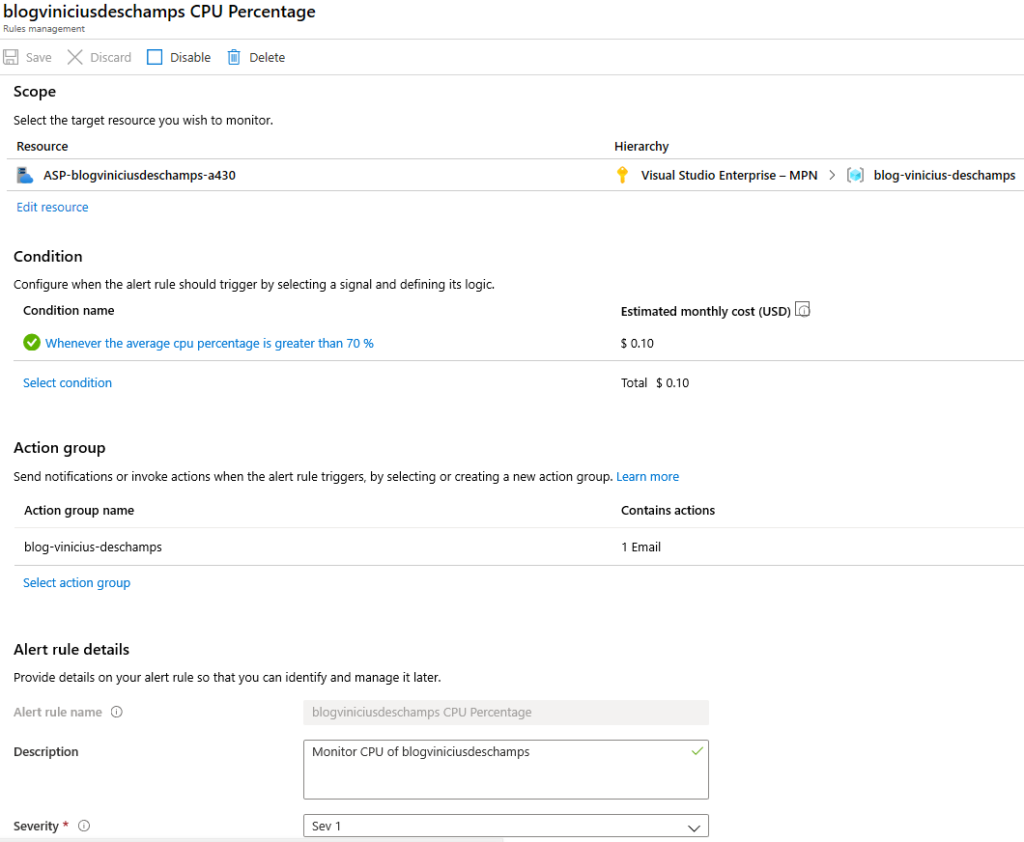
By clicking in blogviniciusdeschamps CPU Percentage, you will see and be able to modify the following things Condition, Action group, Description and Severity.
I hope you liked it, and I’ll see you on my next post.
Photo by Matt Ridley on Unsplash
