Azure · Máquinas Virtuais · Network
3 Ways to reduce network latency in Azure
Network latency is considered one of the factors for your application performance succeed, and in Azure there are plenty possibilities to reduce it.
Network Latency
In summary, latency is the time response between when you take an action and when you see its result

How can I measure Network Latency?
Personally, I prefer to use PsPing, and Microsoft recommends Latte. For Linux based systems, you can use SocketPerf.
In an ideal scenario, you should have access to the servers you want to test, so you can play with a client to server connectivity
Setting the server
Open either CMD or Powershell, navigate to the folder you’ve extracted PsPing and use the following command
psping -s 192.168.0.4:5000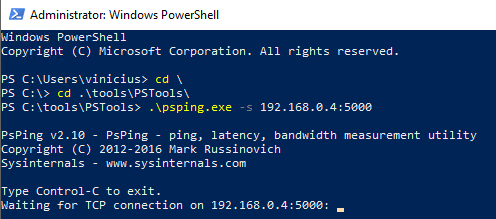
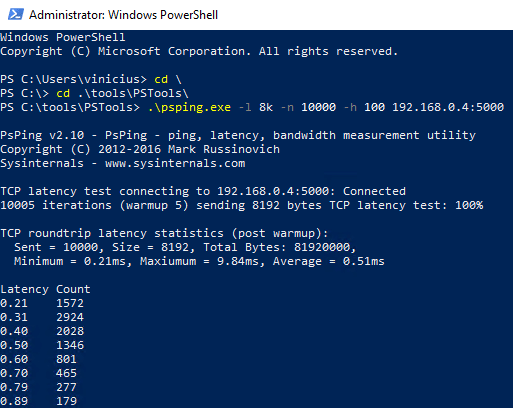
Connect from client to server
Open either CMD or Powershell, navigate to the folder you’ve extracted PsPing and use the following command
psping -l 8k -n 10000 -h 100 192.168.0.4:5000Client side
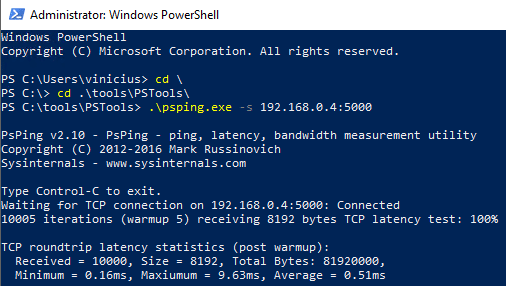
Server side
Azure Resources
Azure provides some resources to reduce latency for Virtual Machines as listed below
- Accelerated networking
- Receive Side Scaling
- Proximity Placement Groups
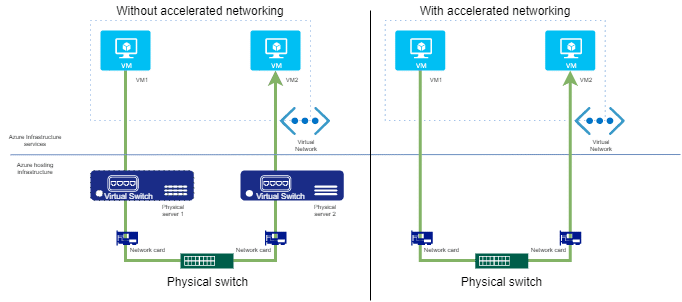
Accelerated Networking
Using Accelerated Networking the communication forwarded to the VM comes directly from VM’s network interface, and no longer passing through the host and the virtual switch reducing the amount of jumps to reach its destination.
Compatible scenarios
- Operational Systems
- Windows Server 2019 Datacenter
- Windows Server 2016 Datacenter
- Windows Server 2012 R2 Datacenter
- Ubuntu 14.04 with the linux-azure kernel
- Ubuntu 16.04 or later
- SLES12 SP3 or later
- RHEL 7.4 or later
- CentOS 7.4 or later
- CoreOS Linux
- Debian “Stretch” with backports kernel
- Oracle Linux 7.4 and later with Red Hat Compatible Kernel (RHCK)
- Oracle Linux 7.5 and later with UEK version 5
- FreeBSD 10.4, 11.1 & 12.0
- Virtual Machine Sizes
- General Purpose and Compute-optimized instances with 2 or more vCPUs
- D/DSv2
- F/Fs
- Instances that support Hyperthreading with 4 or more vCPUs
- D/Dsv3
- D/Dsv4
- E/Esv3
- Ea/Easv4
- Fsv2
- Lsv2
- Ms/Mms
- Ms/Mmsv2
- General Purpose and Compute-optimized instances with 2 or more vCPUs
Enable Accelerated Networking
[/trp_language]
[trp_language language=”pt_BR”]
[/trp_language]
Powershell to Enable Accelerated Networking
$virtualMachine = "proximity-02"
$resourceGroup = "blog-vinicius-deschamps"
$nicName = "proximity-02521"

Stop-AzVM -ResourceGroup $resourceGroup -Name $virtualMachine

$nic = Get-AzNetworkInterface -ResourceGroup $resourceGroup -Name $nicName

$nic.EnableAcceleratedNetworking = $true

$nic | Set-AzNetworkInterface

Start-AzVM -ResourceGroup $resourceGroup -Name $virtualMachine
Receive side scaling
If your Virtual Machine does not meet the Compatible Scenarios to enable Accelerated Networking, you can enable Receive Side Scaling and reach higher maximal throughput.
Although, the optimal scenario it would have these two features enabled.
Compatible Scenarios
- Windows Server 2012 R2 or newer
- Linux kernels released since October 2017
Check Receive Side Scaling in Virtual Machine
Receive side scaling it might be disabled by default on Azure Windows VM, and always enabled by default in an Azure Linux VM.
To check at the Windows VM, let’s connect to it and open the Powershell and type
Get-NetAdapterRss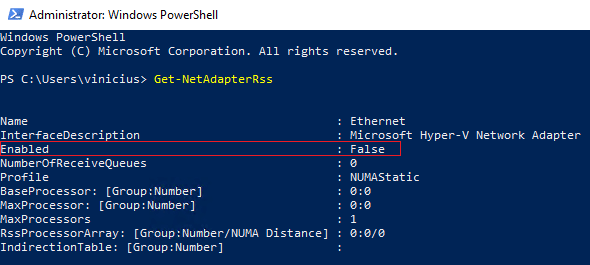
As you can see the RSS is set to False in the Enabled parameter, so to enable it type the following command
IMPORTANT: The Virtual Machine will lose connectivity while performing the command below
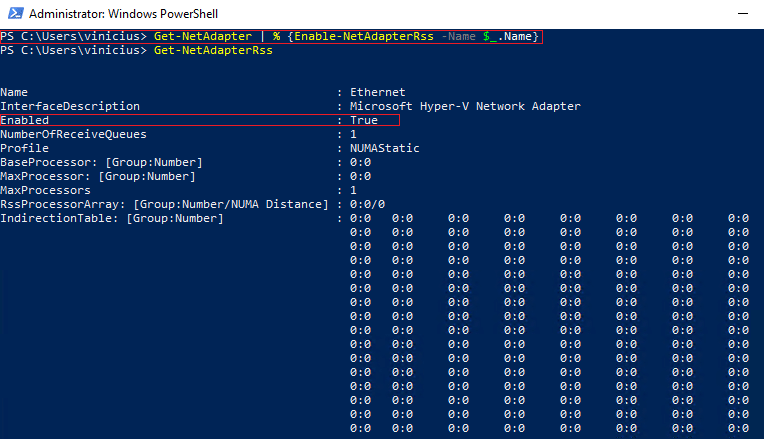
Get-NetAdapter | % {Enable-NetAdapterRss -Name $_.Name} # It will Enable the RSSAnd this command does not print an output, so to check if it worked or not, use the Get-NetAdapterRss once again
Proximity Placement Groups
When you provision a Virtual Machine in Azure, and choose a region, the VM can be provisioned in any datacenter in that region and if you need low latency, you might find yourself with problems.
Proximity Placement Group allows Virtual Machines to be physically located to each other through a logical grouping which helps to reduce latency.
Enable Proximity Placement Group
In the Azure Portal, use the Search feature and type Proximity, then click Proximity Placement Group

Now, click Add

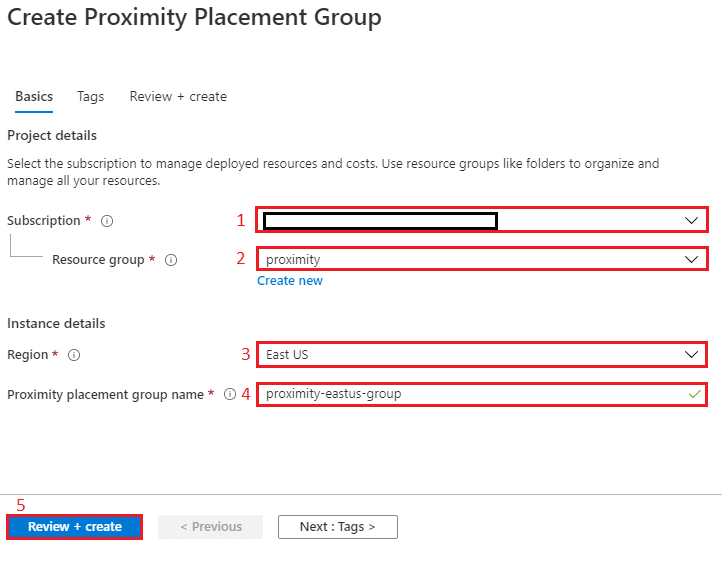
You have to choose Subscription, Resource Group, Region and Proximity Placement Group Name, finally press Review + create
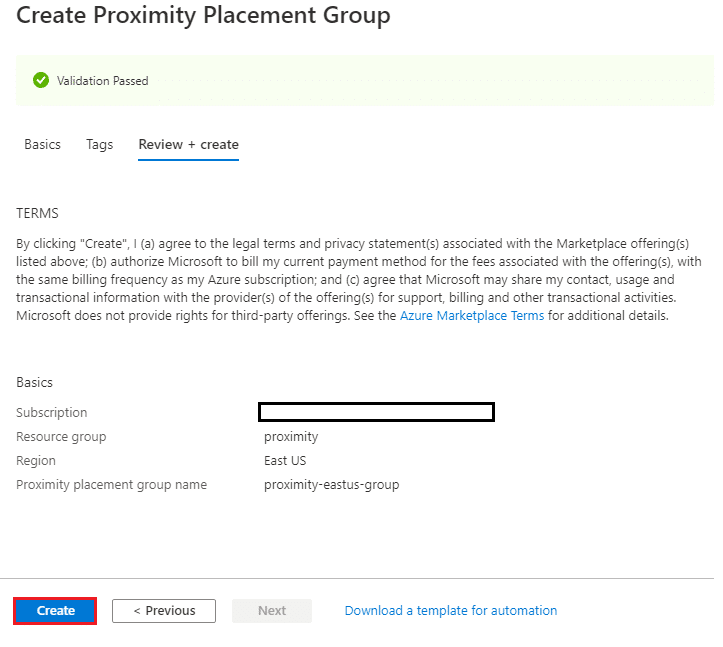
Review the Proximity Placement Group, and hit Create
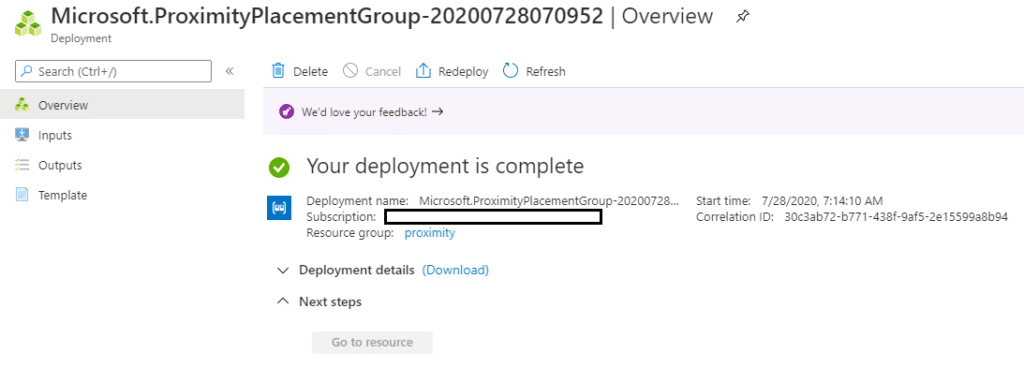
Once you receive Your deployment is complete, then you are ready to change your Virtual Machine Proximity Placement Group
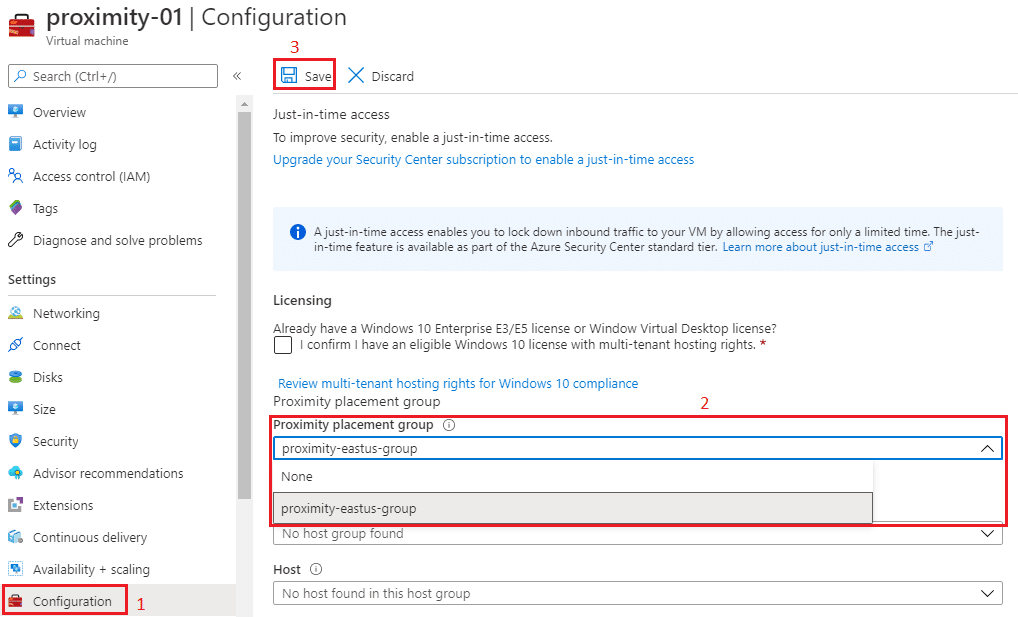
IMPORTANT: Your VM must be in a Stopped State Deallocated so you can change the Proximity Placement Group
At your Virtual Machine, go to Configuration, choose the Proximity Placement Group and click Save
Test Scenario
I have 3 Virtual Machines, and 2 of them have Accelerated Networking, Receive Side Scaling and part of the same Proximity Placement Group.
| Virtual Machine | Accelerated Networking | Receive Side Scaling | Proximity Placement Group |
| proximity-01 | Enabled | Enabled | proximity-eastus-group |
| proximity-02 | Enabled | Enabled | proximity-eastus-group |
| proximity-03 | Disabled | Disabled | – |
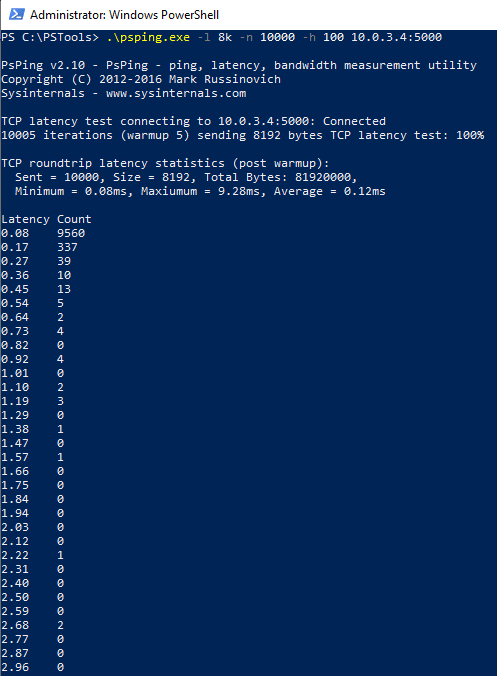
I have followed the steps I showed earlier on How can I measure Network Latency? to perform these tests and proximity-01 was configured to be our Server and proximity-02 and proximity-03 the clients
proximity-02 to proximity-01
proximity-03 to proximity-01
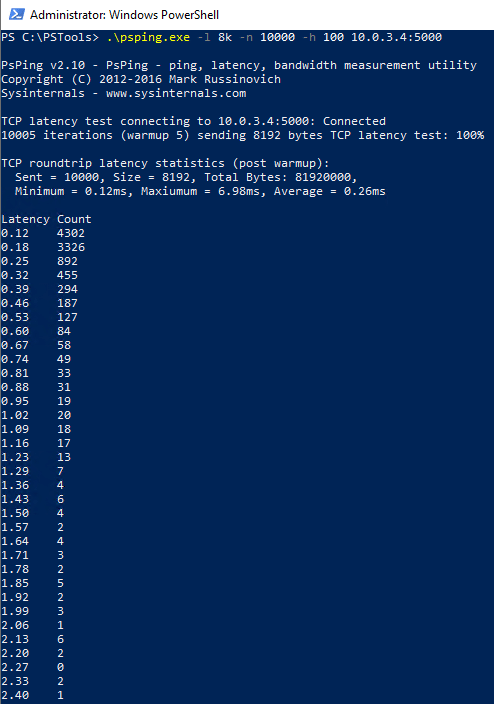
The latency difference was 0.04 ms but keep in mind the package used was 8192 bytes, which means for a bigger package, you will have a bigger latency.
If your application has latency-sensitive workloads, you should certainly consider having these features enabled and applied to your VMs.
And that’s it!
I hope you liked it, and I’ll see you on my next post.
Photo by Peter Mizsak on Unsplash