You already went through changing Sitecore license either on-premises or PaaS, and if that’s the case you know how painful it can become, specially for scaled environments and since Sitecore 9 the license path has changed you should be careful to put everything where it belongs to

Yesterday I was told to replace the Sitecore license of Dev, QA, Staging and Prod, and at the beginning I was pretty much like that

After replace 2 or 3 licenses manually using Azure Advanced Tools (aka Kudu) it felt like

Let’s see if I can find a better way to accomplish this, and I found a Microsoft Powershell script which creates a web app in App Service with its related resources, and then deploys the web app code using FTP. Well, it was a start, wasn’t it?
Then, after some more research, I found an article explaining how to Copy Files to Azure Web App with Powershell and Kudu API
I started to write my own Powershell script, and while looking to address some other questions that appeared during the process I found in SitecoreCloudLabs blog – which unfortunately does not exist anymore – but luckly they kept their Github available.
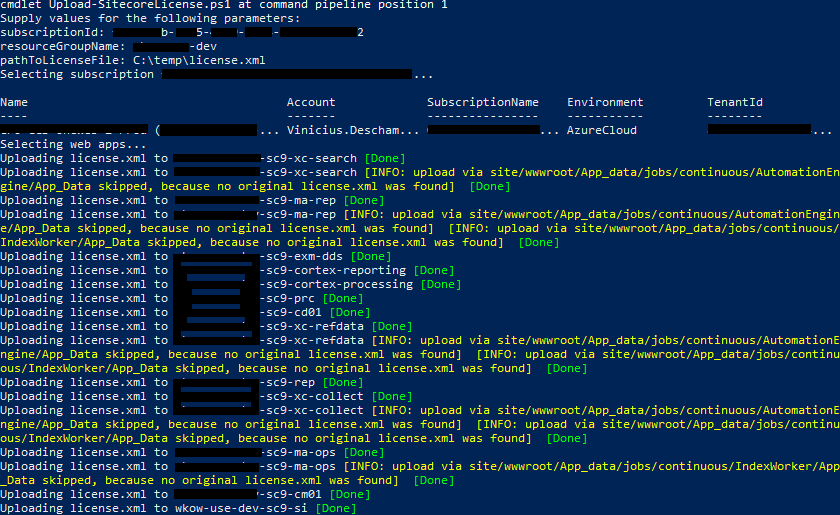
In order to execute the script you must provide the following
- Subscription ID
- Resource Group Name (where the WebApps were provisioned)
- License Path on your local machine
.\Upload-SitecoreLicense.ps1 -subscriptionId “xxxxxxxx-xxxx-xxxx-xxxx-xxxxxxxxxxxx” -resourceGroupName “myResourceGroup” -pathToLicenseFile “C:\\Temp\\license.xml”
For better transparency, script will print out all the operations of license upload while executing them (Hint: script intentionally performs license replacement only by default not to place unnecessary files)

Here is the entire script available on GitHub – https://github.com/fdevelop/Sitecore.Cloud.Labs/blob/master/Upload-SitecoreLicense/Upload-SitecoreLicense.ps1
I wish you enjoyed this script from Sitecore Cloud Labs, and use it from now on!
I hope you liked it, and I’ll see you on my next post.
